DataBinding HubTiles
In an earlier post I looked at adding data binding to a single HubTile control. In this post I'm going to take that to the next logical step and show you how to use data binding to create a dynamic set of HubTiles.
Like every Windows Phone control, it is possible to bind the properties of the HubTile control to values in a DataSource, such as a List or ObservableCollection. These DataSources could be located in the ViewModel portion of your app if you are using the MVVM pattern, but for this example we’ll bind our HubTiles to a local List.
We'll reuse the HubTileItem class we built in the earlier post, but instead of creating just one item, we'll be building and data binding to a List<HubTileItem> object. The easy way to do this is to declare a local List and then call a method that populates this List with values when the page loads.
Firstly, create a property named HubTiles, which will be of type List<HubTileItem>. This will hold our HubTileItems and will be used to data bind to the ListView.
private List<HubTileItem> hubTiles;
public List<HubTileItem> HubTiles
{
    get { return hubTiles; }
}
Next, create a method to add some items into our List of HubTileItems and call this method in the page constructor.
// Constructor
public MainPage()
{
    InitializeComponent();

    PopulateHubTiles();
}

private void PopulateHubTiles()
{
    hubTiles = new List<HubTileItem>();

    hubTiles.Add(
        new HubTileItem
        {
            Title = "Sam",
            Message = "Yosemite Sam",
            ImageUri = new Uri("/Assets/Images/Yosemite-Sam.jpg", UriKind.Relative)
        });

 ...
    hubTiles.Add(
        new HubTileItem
        {
            Title = "Wiley",
            Message = "Wiley Coyote",
            ImageUri = new Uri("/Assets/Images/Wiley-Coyote.jpg", UriKind.Relative)
        });
}
In XAML, create a new ListBox and add our data-bound HubTile to its ItemTemplate.
<ListBox Grid.Row="0" Name="AvatarListView">
    <ListBox.ItemTemplate>
        <DataTemplate>
            <toolkit:HubTile Margin="12,12,0,0" x:Name="MyHubTile"
                        Title="{Binding Title}"
                        Message="{Binding Message}"
                        Source="{Binding ImageUri}">
            </toolkit:HubTile>
        </DataTemplate>
    </ListBox.ItemTemplate>
</ListBox>
Once again we'll override the OnNavigatedTo event and add the code to assign our List property as the ItemsSource for the ListView.
protected override void OnNavigatedTo(NavigationEventArgs e)
{
    AvatarListView.ItemsSource = HubTiles;
    base.OnNavigatedTo(e);
}
Run the app and you should see a nice list of HubTiles running down the page.
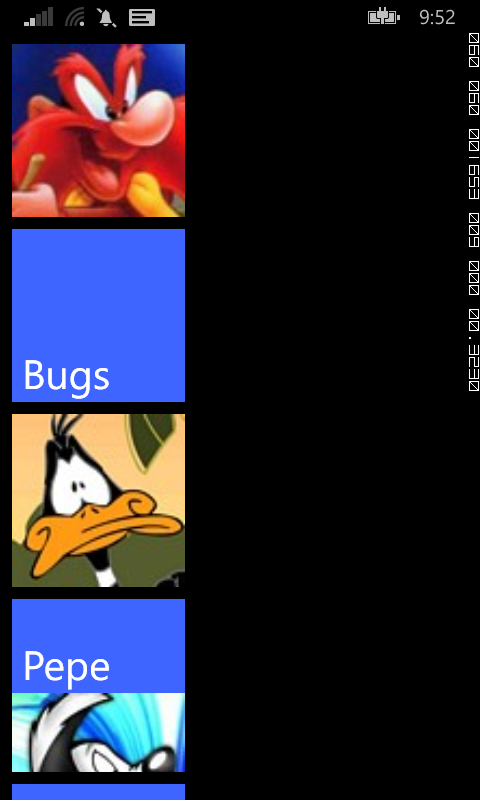
The long list of HubTiles is probably not what you were expecting, but thankfully the Windows Phone Toolkit provides another control, called the WrapPanel that we can use to layout our tiles in a more visually appealing manner.
The WrapPanel is much like a StackPanel, but lays out items in both directions, that is Top-Bottom and Left-Right.
To utilise the WrapPanel in our ListView, all we need to do is add it as the ItemsPaneltemplate and set the orientation to Horizontal. The WrapPanel with then lay out the HubTiles Left-Right, then downwards.
<ListBox Grid.Row="0" Name="AvatarListView">
    <ListBox.ItemsPanel>
        <ItemsPanelTemplate>
            <toolkit:WrapPanel Orientation="Horizontal" />
        </ItemsPanelTemplate>
    </ListBox.ItemsPanel>
    <ListBox.ItemTemplate>
        <DataTemplate>
            <toolkit:HubTile Margin="12,12,0,0" x:Name="MyHubTile"
                        Title="{Binding Title}"
                        Message="{Binding Message}"
                        Source="{Binding ImageUri}">
            </toolkit:HubTile>
        </DataTemplate>
    </ListBox.ItemTemplate>
</ListBox>
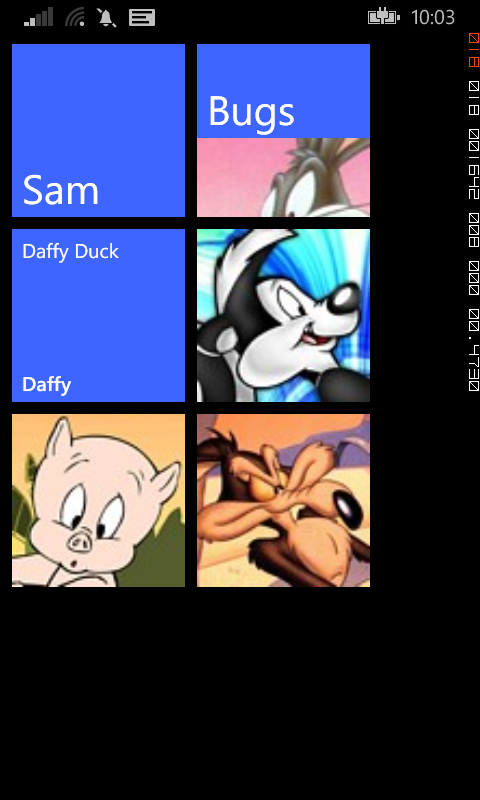
The result will be a nice little grid of HubTiles that will no-doubt make your app the talk of the town.
DataBinding a single HubTile
A little while ago I did a series of posts showing you how to build a Metro-styled start page for our app using HubTile controls from the Windows Phone Toolkit. In those examples, we built up the structure of the page in XAML alone. This approach may be fine for a static list of items, such as a page used for navigating to other pages in your app, but it becomes problematic when we want to display dynamic data, such as values created by the user.
To add data binding to the single HubTile control we created in this earlier post, we need to make a few changes to the XAML and C# code-behind. The first step is to create a new class representing the object we want to bind to the HubTile. In this example we'll just create a simple object HubTileItem with the required properties, but this could be any relevant business object you want to display.
public class HubTileItem
{
    public string Title { get; set; }
    public string Message { get; set; }
    public Uri ImageUri { get; set; }

}
If you're familiar with XAML DataBinding in general, the changes to our HubTile control will be pretty straightforward. Basically we want to replace the hardcoded values for Title, Message and Source with their appropriate properties from their DataSource. We'll also give our HubTile a name, so that we can refer to it from our C# code-behind.
<toolkit:HubTile Margin="12,12,0,0" x:Name="MyHubTile"
            Title="{Binding Title}"
            Message="{Binding Message}"
            Source="{Binding ImageUri}">
</toolkit:HubTile>
The last step is to create a new object of type HubTileItem and assign it as the DataContext for the HubTile control. To do this, we'll override the OnNavigatedTo event and include the code to create and assign the HubTileItem.
protected override void OnNavigatedTo(NavigationEventArgs e)
{
    HubTileItem item = new HubTileItem
    {
        Title = "Sam",
        Message = "Yosemite Sam",
        ImageUri = new Uri("/Assets/Images/Yosemite-Sam.jpg", UriKind.Relative)
    };

    MyHubTile.DataContext = item;

    base.OnNavigatedTo(e);
}
Run your app and your newly data bound HubTile should display exactly the same as it did before.

Adding multiple parameters to JSON-enabled WCF service
One thing you’ll be tempted to do when you first start creating web services is to add multiple parameters to your web methods. Don’t, it will soon trip you up, especially if any of those parameters are complex types.
A better way to handle calling WCF web services that return JSON formatted results is to use Request and Response objects. Your WCF service accepts a single complex Request object that contains all the values it needs to perform its job. The results, along with any exceptions and messages are passed back to the caller in the Response object.
In this post, we’ll modify our GetPlaces method to use Request and Response objects instead of querystring parameters.
First add the following PlaceRequest and PlaceResponse classes.
Code Snippet
- public class PlaceRequest
- {
- public string Country { get; set; }
- public int MaxPopulation { get; set; }
- }
Code Snippet
- public class PlaceResponse
- {
- public bool HasError { get; set; }
- public string Status { get; set; }
- public List<Place> Results { get; set; }
- }
Then modify the GetPlace method as follows.
Code Snippet
- [OperationContract]
- [WebInvoke(Method = "POST", BodyStyle = WebMessageBodyStyle.WrappedRequest, ResponseFormat = WebMessageFormat.Json, RequestFormat = WebMessageFormat.Json)]
- public PlaceResponse GetPlaces(PlaceRequest Request)
- {
- // instantiate our response object
- PlaceResponse response = new PlaceResponse();
-
- // create a list of places
- List<Place> places = new List<Place>();
-
- places.Add(new Place {
- Name = "London",
- Country = "UK",
- Population = 7825200
- });
-
- places.Add(new Place {
- Name = "New York",
- Country = "USA",
- Population = 8175133
- });
-
- places.Add(new Place
- {
- Name = "Los Angeles",
- Country = "USA",
- Population = 3862839
- });
-
- places.Add(new Place {
- Name = "Sydney",
- Country = "Australia",
- Population = 4391674
- });
-
- var results = from p in places
- where p.Country == Request.Country && p.Population < Request.MaxPopulation
- select p;
-
- response.Results = results.ToList();
-
- // return the response
- return response;
- }
You’ll notice that we’ve changed the WebGet tag to WebInvoke. This declaration enables us to use the HTTP POST verb, instead of GET, since the calling function will be sending a complex object in the request body, not just a parameter in the URL.
To test this web service you’ll need to create a POST HTTP request. The easiest way to do this is use a tool such as Fiddler to create the request.
Add Content-Type:application/json to the request header and specify the body as such:
{"Request":{"Country":"USA", "MaxPopulation":"4000000"}}
You’ll notice the values for Country and MaxPopulation are enclosed in an object called Request. This is because the web method parameter is called Request.
If everything goes well, Fiddler will report a response that includes the following JSON.
{"HasError":false,"Results":[{"Country":"USA","Name":"Los Angeles","Population":3862839}],"Status":null}
Adding Parameters to JSON-enabled WCF service
In the previous post we looked at how you configure a WCF web service to return JSON-formatted results. In this post we’ll look at how you can handle methods that need parameters.
We’re going to add a parameter to our GetPlaces method that will be used to filter the results based on the Country property.
Code Snippet
- [OperationContract]
- [WebGet(ResponseFormat = WebMessageFormat.Json)]
- public List<Place> GetPlaces(string Country)
- {
- // create a list of places
- List<Place> places = new List<Place>();
-
- places.Add(new Place {
- Name = "London",
- Country = "UK",
- Population = 7825200
- });
-
- places.Add(new Place {
- Name = "New York",
- Country = "USA",
- Population = 8175133
- });
-
- places.Add(new Place {
- Name = "Sydney",
- Country = "Australia",
- Population = 4391674
- });
-
- var results = from p in places
- where p.Country == Country
- select p;
-
- // return the list of places
- return results.ToList();
- }
- }
Run the web service in the browser and add the parameter name and value as below:
http://localhost:57128/PlaceService.svc/GetPlaces?Country=USA
The response will be the filtered array of Place objects matching the parameter (New York).
[{"Country":"USA","Name":"New York","Population":8175133}]
Return JSON from WCF Web Service
JSON is a popular, light-weight method of formatting data destined for mobile devices. Many popular APIs default to JSON formatted responses, so it’s a good practice to follow.
If you are retrofitting existing WCF web services to return JSON it easy on paper, but can be painful in practice. In this post, we’ll add a JSON friendly WCF service to an existing web application and point out some of the gotchas that can make your life hell.
Firstly, add an AJAX enabled web service to your ASP.NET web application. Visual Studio will add a default web method and make a number of changes to your web config. We’re going to create a method the will return some information about places around the world, so call the web service PlaceService.
Create a simple class to represent the places, this should be in a separate cs file, but for ease of use, I’m adding it after the closing tag of our PlaceService.
Code Snippet
- public class Place
- {
- public string Name { get; set; }
- public string Country { get; set; }
- public int Population { get; set; }
- }
Delete the existing DoWork method and replace it with this code GetPlaces.
Code Snippet
- [ServiceContract(Namespace = "")]
- [AspNetCompatibilityRequirements(RequirementsMode = AspNetCompatibilityRequirementsMode.Allowed)]
- public class PlaceService
- {
- [OperationContract]
- [WebGet(ResponseFormat = WebMessageFormat.Json)]
- public List<Place> GetPlaces()
- {
- // create a list of places
- List<Place> places = new List<Place>();
-
- places.Add(new Place {
- Name = "London",
- Country = "UK",
- Population = 7825200
- });
-
- places.Add(new Place {
- Name = "New York",
- Country = "USA",
- Population = 8175133
- });
-
- places.Add(new Place {
- Name = "Sydney",
- Country = "Australia",
- Population = 4391674
- });
-
-
- // return the list of places
- return places;
- }
-
- }
View the page in the web browser and add the name of the method to the URL like so: http://localhost:57128/PlaceService.svc/GetPlaces
Depending on what browser you use, you’ll either be prompted to download the JSON document, or the browser will display the JSON directly.
{"d":[{"__type":"Place:#FileAccess.Web","Country":"UK","Name":"London","Population":7825200},{"__type":"Place:#FileAccess.Web","Country":"USA","Name":"New York","Population":8175133},{"__type":"Place:#FileAccess.Web","Country":"Australia","Name":"Sydney","Population":4391674}]}
Getting rid of the “d”
Our results are certainly JSON formatted but you’ll notice that they are wrapped in an object called “d”, short for data. Ideally, we want to get rid of the d and simply return an array of Place objects. This is done by modifying the web.config.
Sometimes it seems like configuring your web.config is a dark art, known only to a few souls. Thankfully, this change if pretty easy as all we need to do if modify the endpoint behaviour Visual Studio created for us. Look for the PlaceServiceAspNetAjaxBehavior and insert a tag to enable web HTTP. The modified config will look something like this (your namespace will be different).
Code Snippet
- <endpointBehaviors>
- <behavior name="MyWebApplication.PlaceServiceAspNetAjaxBehavior">
- <enableWebScript />
- <webHttp />
- </behavior>
- </endpointBehaviors>
Run the web service again and this time we’ll have a better response.
[{"Country":"UK","Name":"London","Population":7825200},{"Country":"USA","Name":"New York","Population":8175133},{"Country":"Australia","Name":"Sydney","Population":4391674}]
New size options for HubTiles
One of the main visual changes to the start screen in Windows Phone 7.8 and 8 is that it now supports three sizes of live tiles. The default (medium) tile is now larger and gone is the black strip to the right that used to be home to an arrow that took you to the app screen.
This milestone seemed like a good time to revisit the HubTile control from the Windows Phone Toolkit to see if it could support these new formats. The early versions on the HubTile is was a painful process to choose the size of the tile, having to resort to copying and modifying the XAML elements and animations, as discussed in the post.
Thankfully, since the September 2012 release of the Windows Phone Toolkit, the HubTile control now comes with a Size property that allows you to select from four sizes, Default, Small, Medium and Large. A look at the source code for this release reveals the size of each of these tiles.
switch (hubTile.Size)
{
    case TileSize.Default:
        hubTile.Width = 173;
        hubTile.Height = 173;
        break;

    case TileSize.Small:
        hubTile.Width = 99;
        hubTile.Height = 99;
        break;

    case TileSize.Medium:
        hubTile.Width = 210;
        hubTile.Height = 210;
        break;

    case TileSize.Large:
        hubTile.Width = 432;
        hubTile.Height = 210;
        break;
}
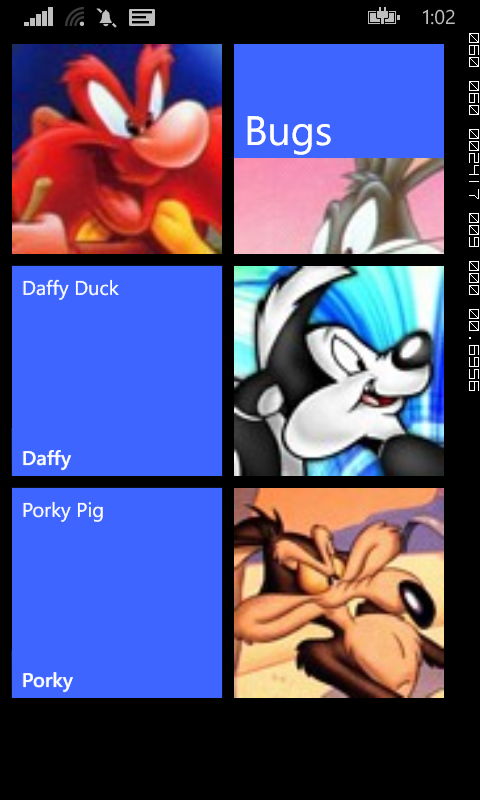
Using these new sizes with the data bound HubTile example we used in another post is simple. The easiest option is to specify the Size property in the ItemTemplate.
<ListBox Grid.Row="0" Name="AvatarListView">
    <ListBox.ItemsPanel>
        <ItemsPanelTemplate>
            <toolkit:WrapPanel Orientation="Horizontal" />
        </ItemsPanelTemplate>
    </ListBox.ItemsPanel>
    <ListBox.ItemTemplate>
        <DataTemplate>
            <toolkit:HubTile
		Margin="12,12,0,0"
		Title="{Binding Title}"
		Message="{Binding Message}"
		Source="{Binding ImageUri}"
                Size="Medium"/>
        </DataTemplate>
    </ListBox.ItemTemplate>
</ListBox>
Of course, you can also bind the Size property to property on your underlying data source. To do this, add a TileSize property to the HubTileItem class and modify the HubTile control XAML as below.
public class HubTileItem
{
    public string Title { get; set; }
    public string Message { get; set; }
    public Uri ImageUri { get; set; }
    public TileSize TileSize {get; set;}
}
<toolkit:HubTile
	Margin="12,12,0,0"
	Title="{Binding Title}"
	Message="{Binding Message}"
	Source="{Binding ImageUri}"
   	Size="{Binding TileSize}"/>
Using the Bing Maps API in your WP7 App
A while ago I wrote a post detailing how easy it was to use the Bing Maps API to GeoCode an address, which enables you to get the geographical position (Latitude and Longitude) of a location when only given the street address.
This has been invaluable in a number of applications since then including the TrafficMATE app which used street addresses to help create Routes to check for traffic incidents. So how exactly can we get the Lat/Long for a location when only given the street address? Well thankfully it's easy.
As in the previous post, we need to start by adding a Service Reference to our project. The Bing Maps API service that deals with Geocoding is located at http://dev.virtualearth.net/webservices/v1/geocodeservice/geocodeservice.svc
I called the reference Bing.Geocode, but feel free to call it whatever you like.
You will also need to get a developer key to use with the API, but don't worry that's easy too. Chances are that if you have already been using Bing Maps with the Map control in Windows Phone 7 then you already have one of these. If not, go get one at http://www.bingmapsportal.com/
The code that calls the Bing Maps Geocode service is fairly easy. In your XAML all you really need is a TextBox where the user can enter an address and then a Button they click to call the function.
//get lat/long for this address
GeocodeRequest request = new GeocodeRequest();
request.Credentials = new Credentials();
request.Credentials.ApplicationId = YourKey;
request.Query = this.TextBoxOrigin.Text;
GeocodeServiceClient client = new GeocodeServiceClient();
client.GeocodeCompleted += new EventHandler<GeocodeCompletedEventArgs>(client_GeocodeCompleted);
client.GeocodeAsync(request);
Then all you need to do is interrogate the results sent back from Bing in your GeocodeCompleted event handler.
void client_GeocodeCompleted(object sender, GeocodeCompletedEventArgs e)
{
GeocodeResponse response = e.Result;
if (response.Results.Count > 0)
{
MessageBox.Show(response.Results[0].Address.FormattedAddress);
}
}
As you can see from the code above, I am simply selecting the first record in the Results array and displaying the Address.FormattedAddress property. Other properties that may be useful are Address.Locality (AKA:Suburb) Address.AdminDistrict (AKA:State).
The other important fields that you will want to process are the Lat and Long. These are contained within the Location array in fields aptly named Latitude and Longitude. These could be easily returned using the syntax response.Results[0]Location[0]Latitude and response.Results[0]Location[0]Longitude.
Handling Pushpins selection with the WP7 Map control
As mentioned in the previous post, one of the benefits of using your own custom business objects as the data source for your Map control Pushpin layer is that you can access all the information about the item you select.
So how do we get back a single Camera object when a user presses on a pushpin? Well thankfully this is very easy. By using a List<Camera> as the ItemSource for the MapsItemControl control containing our Pushpins we are able to extract the data back when the user presses the Pushpin.
There are a number of methods you can use that are triggered when the user clicks or taps on the screen, but in this example we will use the new ‘Tap’ event, made available in the Mango release. The map xaml has been covered in the previous post, but now all we need to do is add the Tap event handler such as:
<my:Pushpin Location="{Binding Location}" Tap="Pushpin_Tap" >
</my:Pushpin>
The key to unlocking all the goodness obtained by binding the pushpins to your own objects is to realise that the DataContext of the Pushpin actually contains your business object.
private void Pushpin_Tap(object sender, System.Windows.Input.GestureEventArgs e)
{
var pushpin = sender as Pushpin;
Camera cam= (Camera)pushpin.DataContext;
MessageBox.Show(cam.Name);
}
In this example we can direct cast the Pushpin.DataContext to our business object, which in this example is called Camera. Once we have a Camera object, we can access any of the properties and methods associated with it.
Obviously you could do a lot more than simply displaying a message when the Pushpin is selected, for example you could navigate to another page displaying information relevant to the selected Pushpin.
Using Business Objects with the WP7 Map Control
One aspect of creating and adding pushpins to the Windows Phone 7 Map control that turned out to be a welcome revelation to me is that most geo-centric Business Objects can be used as the data source for the pushpin layer with little or no modification.
In a previous post we looked at how easy it was to add a single pushpin to the Map control. If we look at that method again, we see that all we really need is a geographical location. This means that as long as your object has a Latitude and Longitude, you can use it as a pushpin.
This was very handy in TrafficMATE especially when displaying camera locations on a map. The Camera object model we created already contained the Lat/Long of the camera. This meant that I could easily use a List<Camera> object as the ItemSource for the pushpin layer.
Here’s the xaml for a map showing camera locations.
<my:Map x:Name="CameraMap"
CredentialsProvider="{Binding CredentialsProvider}"
CopyrightVisibility="Collapsed"
LogoVisibility="Collapsed"
ZoomLevel="16">
<my:Map.Foreground>
<SolidColorBrush Color="{StaticResource PhoneForegroundColor}"/>
</my:Map.Foreground>
<my:MapItemsControl x:Name="PushpinItems" Height="300">
<my:MapItemsControl.ItemTemplate>
<DataTemplate>
<my:Pushpin Location="{Binding Location}" >
</my:Pushpin>
</DataTemplate>
</my:MapItemsControl.ItemTemplate>
</my:MapItemsControl>
</my:Map>
The code that is of interest to us is the section defining the MapItemsContol named PushpinItems. Just like the other WP7 databindable controls, the MapItemsControl supports an ItemTemplate, which in this example is made up of Pushpin controls.
The Location property of the Pushpin, which is of type GeoCoordinate, is bound to a field in our data source called ‘Location’. All we need to support binding is ensure our business object exposes a GeoCoordinate property and we are good to go. A simplified version of the Camera object is shown below.
public class Camera
{
public string Name { get; set; }
public string Description { get; set; }
public double Latitude { get; set; }
public double Longitude { get; set; }
public GeoCoordinate Location
{
get { return new GeoCoordinate(this.Latitude, this.Longitude); }
}
}
With the help of an async call to a webservice, I populated a List<Camera> with relevant results and was able to set the ItemSource for the pushpin layer using something like:
PushpinItems.ItemsSource = cameras;
The key benefit of binding your objects directly to the pushpin layer is that you have direct access to the object whenever you select a pushpin. There is no need to make a second trip to the webservice when the user selects a pushpin - you already know everything there is to know about the underlying object. In a future post, I will explore how you can retrieve the underlying information from a Pushpin created using your business objects.
Windows 8 Developer Preview
Loading the Windows 8 Developer Preview
After downloading the Windows 8 Developer preview and attempting to install the OS on both the VMWare Player and Oracle VM, I soon found out that this was not going to be an easy option. Oracle VM got me the closest and at least looked like it was installing Windows 8, but in the end, neither worked.
My next option was to install the preview OS on my old desktop PC, which originally had Windows XP Media Centre, but had been dual boot with Windows 7 since I added a second hard-drive.
After going through the steps to make a bootable USB using the Windows 7 USB/DVD Download Tool, I fired up my 5-year old AMD powered PC and selected the appropriate USB drive in the BIOS.
The OS installed very quickly, although it did restart a couple of times. On one restart it asked me to choose between the original Windows 7 installation or a new Windows 8, which I happily accepted.
After the initial installation, I selected the default 'Use express settings' option from the Settings screen and entered my windows live email address in the next screen.
On the 'Keep your account safer' screen I was surprised to find that Microsoft think they know my mobile phone number better than I do and after entering the correct , full number several times, only to be told that it was not correct for my country/region, I thought I might have been getting it wrong all these years. Turns out, MS wanted me to drop the leading zero(0) from the number. It also pulled me up on the secret question answer when I only entered 4 characters – I guess I will have to rename my first pet (may they rest in peace). I eventually decided not to bother with the secret question and I was able to proceed without a hitch.
So after a fairly brief installation process, I was logged into my Windows 8 developer preview, which it said was customised just for me based on my Windows Live account details. First button I tried was the weather button, only to find that it displayed Anaheim, CA – quite a few thousand miles from my home in Brisbane.
My next challenge was finding out how to exit from the weather app and go back to the main start screen. After trying every key on the keyboard, I discovered that the Windows Key is the answer – I guess I am used to the dedicated back button on Windows Phone 7.
Next app that looked interesting was the tweet@rama app – but it didn't want to play, so I headed back to the start screen for something better. Jumping into NearMe, I was again frustrated by the fact that the closest matches were in California, but I guess that must just be a sign to relocate.
After a restart, what startled me most was the speed at which that login screen came up. I mean this PC is old and not all that fast, so when I showed the login screen after only 15 seconds, I was completed unprepared.
Cold boot to 'Choose an operating system' screen 34.8 sec, login screen to start screen 16.1 sec. So even on my old clunker, I am fully online in less than a minute.