Windows Phone App Studio
At a recent Microsoft event one of the presenters reminded the audience of the Windows Phone App Studio and mentioned a bunch of new features, including support for Windows 8.1 and Windows Phone 8.1 Universal Apps.
I signed up for an account when App Studio was still in limited beta and was immediately impressed by the ease at which you could develop a simple content based app. I remember mentioning it to a couple of guys in the office and saying that if this sort of thing kept up, we'd all be out of jobs.
Having not done a lot with App Studio since, I decided to fire it up again and see just how easy it was to create an app based on some publically available content and publish it to the store.
I've got a friend who enjoys going on cruises, almost to the point of it being an obsession and as we'd all just booked cruises for later in the year, I decided I'd build an app for cruisers called CruiseJunkie.
Step 1: Sign up for an account using your Microsoft account.
Step 2: Start a new project and select the template type (I chose an Empty App)
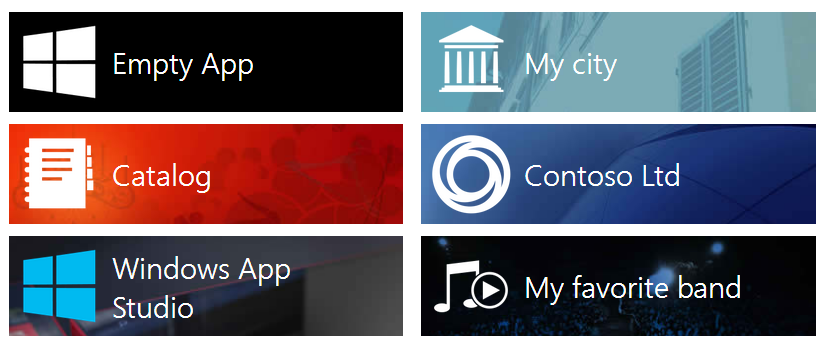
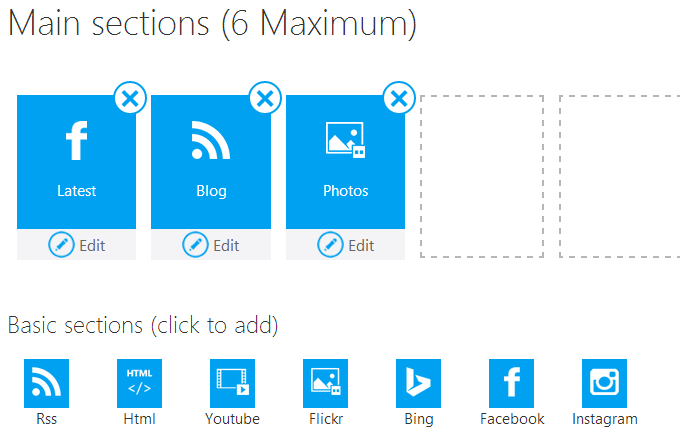
Step 3: Add some 'sections' to your app.
Sections render as PanoramaItems on the main page of the app. There's a few common sections available, including Facebook, Instagram, and Flickr. You can also add your own collections, which could contain static data (stored in the app) or dynamic data (store in Azure).
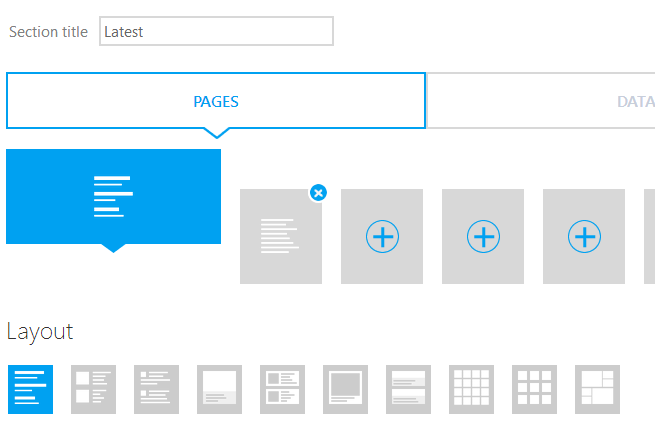
Step 4: Choose a style for your sections.
You can choose from a large range of styles for each section so that no matter what sort of data you're pointing at, there's bound to be one that looks just right.
Most sections consist of two pages, one showing a list of data and the other showing a single item. You can choose layouts for both of these pages.
Step 5: Choose a theme for your app
You can choose from a Light or Dark theme, or go ahead and create your own by setting Background images and choosing appropriate colours.

Step 6: Upload your Tiles
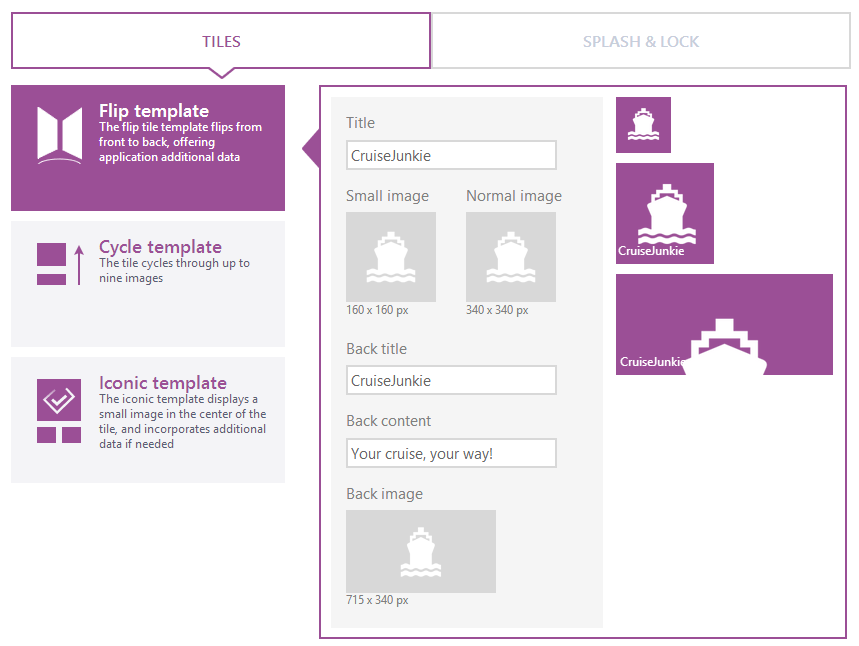
Getting artwork for you app, including the tiles, is probably the most time-consuming task in the whole process. I grabbed a suitable icon from the Noun Project for CruiseJunkie, so it didn't take too long. The App Studio page displays the sizes you need depending on the tile option you choose. For the Flip tile template, you'll need 160x160, 340x340 and 715X340 jpg images.
Step 7: Download the source code, or publish you app
Once you've completed the steps above, you're ready to start thinking about what to do next. You can download the source code and make additional changes using Visual Studio, or go ahead and publish the app.
Since I wanted to test the end-to-end process I decided to publish the app. This process wasn't quite as easy as I had though it should be. App Studio includes a reasonably detailed set of instructions to follow here as well as a video.
After you associate your Store app with your App Studio project you'll still need to download the complete package (XAP file and screenshots) and upload it into the correct places in the Store. I'd like to see this a little more integrated, since you've already provided most of the information needed by the Store in your project. Having said that, it is still really easy.
Previewing your app
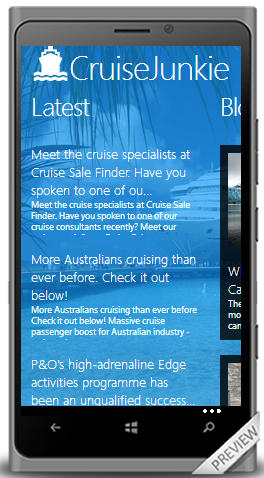
One of the best features of App Studio is the live preview that lets you see exactly what your app looks like. The Preview is displayed on every step of the process, so you're never left wondering how the changes you are making will look in your app
Displaying the progress bar in WP8
One of the really nice additions to the Windows Phone 8 SDK is the ProgressBar. This control, which displays the ‘loading’ dots in your app is such as common part of the Windows Phone OS that it was a surprise that in WP7 it wasn’t provided to developers out of the box.
This has changed in WP8 and showing the progress bar is a painless experience, but one that will immeasurably assist in the useability of you app.
The code below shows how you could display the progress bar while you wait for an asynchronous function to complete.
private async void btn_continue_Click(object sender, RoutedEventArgs e)
        {
            // show progress bar
            SystemTray.ProgressIndicator = new ProgressIndicator();
            SystemTray.ProgressIndicator.IsIndeterminate = true;
            SystemTray.ProgressIndicator.IsVisible = true;

            // call some long-running process
            await ...;

            SystemTray.ProgressIndicator.IsVisible = false;

        }
Asset Management #2 - Selecting a location
In this post we’ll continue building an Asset Management app that enables a field worker to selected a point on the map and lodge a new defect.
In the first post we looked at how we can centre the map at the devices current location. In this post, we’ll add functionality to handle when the user selects a location on the map.
We want to do two things when the user selects a location. Firstly, we want to show a point on the map and secondly we want to store the street address. We’ve covered most of this code in previous posts, but here we’ll put it all together in a real-world scenario.
There are a number of ways to display a UI element on the Map control, including programmatically via code-behind and in XAML. In both cases, we’ll use the Pushpin class that comes with the Windows Phone Toolkit.
Adding a Pushpin Programmatically
To add a pushpin to the Map control programmatically we’ll need to declare a couple of local variables for a Pushpin, MapOverlay and MapLayer. We’ll create a new map overlay that is displayed on a map layer when the page first loads, then we’ll display a Pushpin to it when the user taps the map. As we only want one Pushpin, we’ll reset the location of the Pushpin every time the user taps the maps, rather than creating a new Pushpin.
// variables for displaying the pushpin
Pushpin pin = new Pushpin();
MapOverlay overlay = new MapOverlay();
MapLayer layer = new MapLayer();

// local variable to store the selected location
MapLocation defectLocation;
The next step is to add a handler for the Tap event for the Map control. This handler needs to place a Pushpin on the Map and then call the ReverseGeocodeQuery to get the street address.
<maps:Map x:Name="LocationMap" Tap="LocationMap_Tap" />
private void LocationMap_Tap(object sender, System.Windows.Input.GestureEventArgs e)
{
    //get the location of the Tap
    GeoCoordinate location = LocationMap.ConvertViewportPointToGeoCoordinate(e.GetPosition(LocationMap));

    //show a pushpin on the map
    pin.GeoCoordinate = location;

    //set the overlay location
    overlay.GeoCoordinate = location;

    //add the pushpin to the overlay
    overlay.Content = pin;

    //reverse geocode the location
    ReverseGeocodeQuery reverse = new ReverseGeocodeQuery();
    reverse.GeoCoordinate = location;
    reverse.QueryCompleted += reverse_QueryCompleted;
    reverse.QueryAsync();
}
When the ReverseGeocodeQuery completes, we’ll store the address and suburb details in a local variable. This value, along with the location of the Pushpin could then be saved along with any other relevant details, to create a new asset defect.
void reverse_QueryCompleted(object sender, QueryCompletedEventArgs<IList<MapLocation>> e)
{
    // store the address in a local variable
    if(e.Error==null)
    {
        //grab the first location
        if (e.Result.Count() > 0)
        {
            defectLocation = e.Result.FirstOrDefault();
        }
    }
}
Modify the OnNavigatedTo event to include code to add our overlay to the layer and the layer to the map.
protected async override void OnNavigatedTo(NavigationEventArgs e)
{
    // get current location
    Geolocator locator = new Geolocator();
    Geoposition position = await locator.GetGeopositionAsync();
    var location = position.Coordinate.ToGeoCoordinate();

    // center the map at the current location
    LocationMap.Center = location;
    LocationMap.ZoomLevel = 18;

    //the map overlay will hold the pushpin
    overlay.PositionOrigin = new Point(0, 1);

    //add the overlay to the layer
    layer.Add(overlay);

    //add the layer to the map
    LocationMap.Layers.Add(layer);

    base.OnNavigatedTo(e);
}
The code is pretty self-explanitory, except perhaps why we're setting the overlay.PositionOrigin. If you comment out this line, you'll notice that the Pushpin displays a little below the location you clicked on the map. Setting the origin of the overlay rectifies this.
Test the app and when you tap on the app, the pushpin will be displayed. Tap again in a different location and the pushpin will be moved to that location.
Asset Management #1 - Getting users location
While building a recent asset management app for mobile field staff, I had to create a page where they could lodge defects. Part of the lodgement process required them to select the location of the defect (latitude/longitude) and enter the physical street address.
The original HTML5 app that I built used the javascript version of Nokia HERE maps that enabled the field staff to perform these tasks, but moving to Windows Phone 8 meant that this could now be handled by the new API features.
The first step to achieve this is to add a Map control to your XAML page, remembering to include the Microsoft.Phone.Maps.Control XML namespace in the page declaration.
xmlns:maps="clr-namespace:Microsoft.Phone.Maps.Controls;assembly=Microsoft.Phone.Maps"
<maps:Map x:Name="LocationMap" />
When the user opened the page, I wanted the map to zoom to their current location to make it as quick as possible to select the asset that needed fixing. To do this, we need to initialise a Geolocator, which can be used to return the current location.
using Windows.Devices.Geolocation;
Override the OnNavigatedTo to get the current location and center the map
protected async override void OnNavigatedTo(NavigationEventArgs e)
{
    // get current location
    Geolocator locator = new Geolocator();
    Geoposition position = await locator.GetGeopositionAsync();
    var location = position.Coordinate.ToGeoCoordinate();

    // center the map at the current location
    LocationMap.Center = location;
    LocationMap.ZoomLevel = 18;

    base.OnNavigatedTo(e);
}
One catch with this process is that the classes used to represent a location from the Geolocator and the Map are similar, but actually different. The Geolocator returns a Windows.Devices.Geolocation.Geocoordinate objects, but to use this on a map we need a System.Device.Location.GeoCoordinate.
While it’s possible to write your own converter, the Windows Phone Toolkit provides a handy map extension that does the conversion for us. You’ll need to add a reference to the Toolkit in your code-behind.
using Microsoft.Phone.Maps.Toolkit;
Then you can call the ToGeoCoordinate() extension method of the Geocoordinate class.
Before testing your app, be sure to set the ID_CAP_LOCATION capability for you app in the WMAppManifest or you'll get an exception.
Windows Phone 8 - The new map services
One of the really nice enhancements that have been made to the mapping capabilities in the Windows Phone 8 SDK is the addition of services such as geocoding and reverse geocoding, which are functions that are often required when building map-based solutions.
I wrote a post some time ago showing how you could utilise the Bing Maps API to perform these tasks, but in WP8, they’re built in to the SDK. GeocodeQuery and ReverseGeocodeQuery are two classes in the new Microsoft.Phone.Maps.Services namespace that provide these function.
GeocodeQuery
Geocoding is the process of retrieving a geographical location (latitude/longitude) when provided a physical address, such as a street and suburb name. You’d use geocoding in your app if you want users to enter an address in a textbox and then see that displayed on a map.
The code to perform a GeocodeQuery couldn't be much easier. Assuming you have a TextBox name SearchTextBox where the user will enter the address to query and a Button that they press, your code to perform the query will look as simple as this.
private void SearchButton_Click(object sender, RoutedEventArgs e)
{
    GeocodeQuery query = new GeocodeQuery();
    query.SearchTerm = SearchTextBox.Text;
    query.GeoCoordinate = new System.Device.Location.GeoCoordinate(-27.5, 153);
    query.QueryCompleted += query_QueryCompleted;
    query.QueryAsync();
}
You will need to decide how to handle the results of the query, which if successful will be a list of MapLocation objects. For this example we'll just display the street address of the first record, but obviously you could display the results in a list and let the user select the relevant record.
void query_QueryCompleted(object sender, QueryCompletedEventArgs<IList<MapLocation>> e)
{
    //check that the query didn't raise an exception
    if(e.Error==null)
    {
        //grab the first location//
        if (e.Result.Count() > 0)
        {
            var location = e.Result.FirstOrDefault();
            MessageBox.Show(location.Information.Address.Street);
        }
    }
}
The MapLocation class contains a number of properties, including GeoCoordinate (latitide/longitude) and Information. The Information property returns a LocationInformation object that can be used to retrieve values such as the Address, Description and Name of the location. Depending on the addres that was entered, not all of these values will be populated. For example, if the user enters a regular suburban address, only the Address property is populated.
ReverseGeocodeQuery
As the name suggests, reverse geocoding is the process of retrieving a physical address (street/suburb) when provided a geographical location (latitude/longitude). You’d use reverse-geocoding in your app if you wanted users to be able to tap a point on a map and see what the address is.
To illustrate the code to perform a ReverseGeocodeQuery, we’ll need a simple UI that allows a user to select a location on a map. You can either add a map via code or in XAML, but we’ll use XAML for this example.
Firstly add the XML namespace to your page declaration.
xmlns:maps="clr-namespace:Microsoft.Phone.Maps.Controls;assembly=Microsoft.Phone.Maps"
Add a map control and set an appropriate Center and ZoomLevel and add the Tap event handler.
<maps:Map x:Name="LocationMap" Center="-27.5, 153" ZoomLevel="10" Tap="LocationMap_Tap" />
Next we’ll need to handle the Tap event, which will be triggered when the user taps the map.
private void LocationMap_Tap(object sender, System.Windows.Input.GestureEventArgs e)
{
    //get the location of the Tap
    GeoCoordinate location = LocationMap.ConvertViewportPointToGeoCoordinate(e.GetPosition(LocationMap));

    //reverse geocode the location
    ReverseGeocodeQuery reverse = new ReverseGeocodeQuery();
    reverse.GeoCoordinate = location;
    reverse.QueryCompleted += reverse_QueryCompleted;
    reverse.QueryAsync();
}
Lastly, you'll want to handle the callback from when the query completes. This could be as simple or as complex as you like, but for this example we'll just show the street name of the location.
void reverse_QueryCompleted(object sender, QueryCompletedEventArgs<IList<MapLocation>> e)
{
    // do something with the address
    if(e.Error==null)
    {
        //grab the first location
        if (e.Result.Count() > 0)
        {
            var location = e.Result.FirstOrDefault();
            MessageBox.Show(location.Information.Address.Street);
        }
    }
}
Windows Phone 8 - The new map tasks
With the release of Windows Phone 8, Microsoft has added a new map control and related mapping tasks. Windows Phone 7 used the BingMapControl and provided a number of Tasks that provided access to the built-in maps app from within your app. I discussed the BinMapsTask and the BingMapsDirectionTask in a couple of previous posts.
While still available in your Windows Phone 8 apps, the Bing-flavoured map control and tasks are deprecated and should not be used for any new development.
Thankfully, replacing the Task is an extremely process and they provide the exact same functionality.
The Maps task opens the built-in map app at a specified location and can be used to search for local results, such as restaurants or coffee houses. You call this function in the exact same way as the old BingMapsTask.
//the old
//BingMapsDirectionsTask dir = new BingMapsDirectionsTask();
//dir.End = new LabeledMapLocation("Address", new GeoCoordinate(-27.3, 152.9));
//dir.Show();

//the new
MapsDirectionsTask dir = new MapsDirectionsTask();
dir.End = new LabeledMapLocation("Address", new GeoCoordinate(-27.3, 152.9));
dir.Show();
The Maps directions task can be called from your app and launches the built-in maps app to provide directions to a specified location. You call this function in the exact same way as the old BingMapsDirectionTask.
//the old
//BingMapsTask search = new BingMapsTask();
//search.Center = new GeoCoordinate(-27.5, 153);
//search.SearchTerm = "coffee";
//search.Show();

//the new
MapsTask search = new MapsTask();
search.Center = new GeoCoordinate(-27.5, 153);
search.SearchTerm = "coffee";
search.Show();
A new way to edit your app settings
As part of the recent changes to the Windows Phone SDK, Microsoft has kindly added a user interface for editing your app’s manifest file.
Back in Windows Phone 7/Visual Studio 2010 days, when you wanted to define the capabilities your app required, or make other configuration changes, you had to edit the XML directly in the WMAppManifest file.
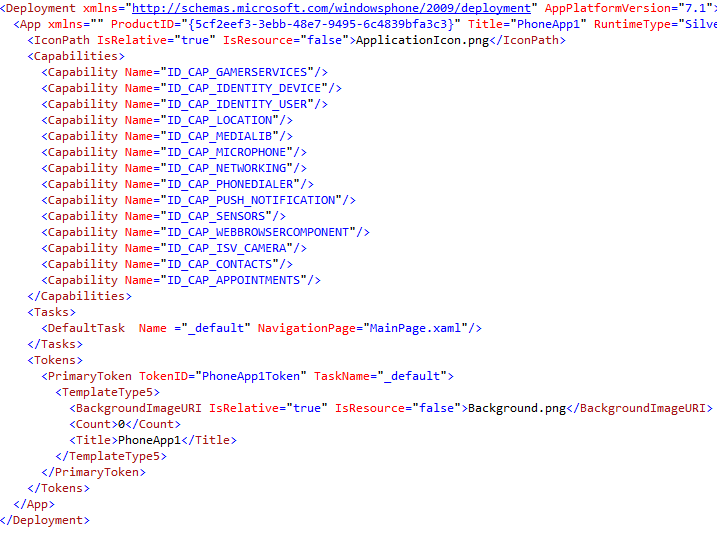
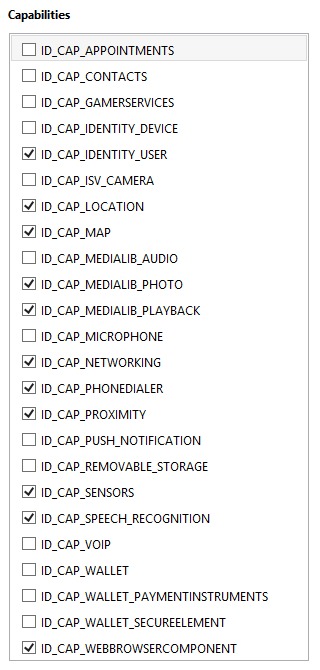
The Windows Phone 8 SDK now includes a nice little manifest designer, which is not only a nice touch, but pretty much required now that there is a raft of new properties that you can set.
Double clicking the WMAppMenifest file in your Visual Studio project will automatically open the manifest designer, instead of the XML source. The various settings in the manifest are available from one of the tabbed sections of the manifest designer.
Windows Phone 8 – First Look at the SDK
So like many Windows developers I have been waiting (not so patiently) for the release of the Windows Phone 8 SDK. Like many, I questioned Microsoft's delay at releasing the SDK to the developer community and wondered why it had taken them so long.
Having downloaded the SDK after its Tuesday release and thrown together a quick sample project, I can honestly say that I am impressed. What has impressed me the most is the quality of the emulator. The Windows Phone 7 emulator helped you develop apps by providing the hooks to many of the built in features, such as contacts and the camera, but these were only available when you called specific methods of the API. For instance, you only had access to the contacts list when you called one of the chooser tasks, such as the email address chooser task. In the Windows Phone 8 SDK all this has changed. The emulator provides what can only be described as the complete phone OS in a virtual machine.
As I fired up my first WP8 app (using one of the ready-to-run templates) I was more interesting in hitting the Windows key on the emulator and exploring the WP8 interface than I was on getting down-and-dirty with the XAML or c# code. To say that I was impressed is an understatement. As I said to a colleague, if I could pick up my laptop and start making calls I'd be running this baby everywhere.
Start Screen
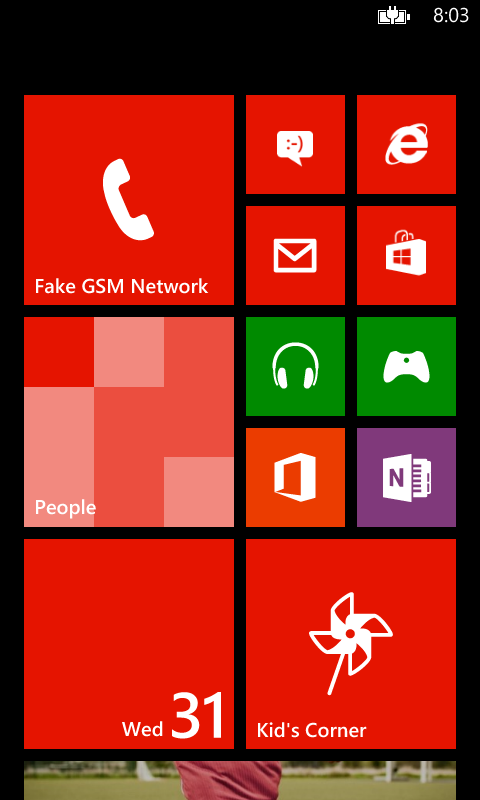
The most obvious change between WP7 and WP8 is the start screen. Gone is the "waste of space" (as one buddy called it) at the right hand side and in its place is a full-screen of customizable live-tiles that enable you to make YOUR Windows Phone truly yours. No longer are you stuck with the grid of 62x62 pixel tiles. You can now choose from three sizes depending on the importance you place on the application the tile refers to. Spend all your time texting your friends, then you'll want the Messaging tile huge.
Kid's Corner
As the father of a 4-year old, I can't tell you how excited I was when I first read about the Kid's Corner feature on Windows Phone 8. Comments from popular blogs and IT news sites tended to be split into two camps. Those who thought having a save place for your kids to play was great and those who thought you were stupid for giving your expensive smart phone to a child. Obviously the latter seldom spend any time with children.
I love the idea of being able to let my son play games while we face those unavoidable delays, such as doctor's surgery rooms or the hairdresser. The fact that he can play and I don't have to worry about him pressing the wrong combination of buttons and making a long-distance means I can relax and not be a helicopter parent.
So how does Kid's Corner Work?
Pressing the Kid's Corner tile on the start screen will enable you to configure the apps, games and music you want your children to have access to. The configuration tool will also prompt you to set a password for the lock screen, so that if your kids turn out to be ultra-smart (as most do) and figure out the different swipe gesture required to enter with 'full-permissions', you'll be safe.
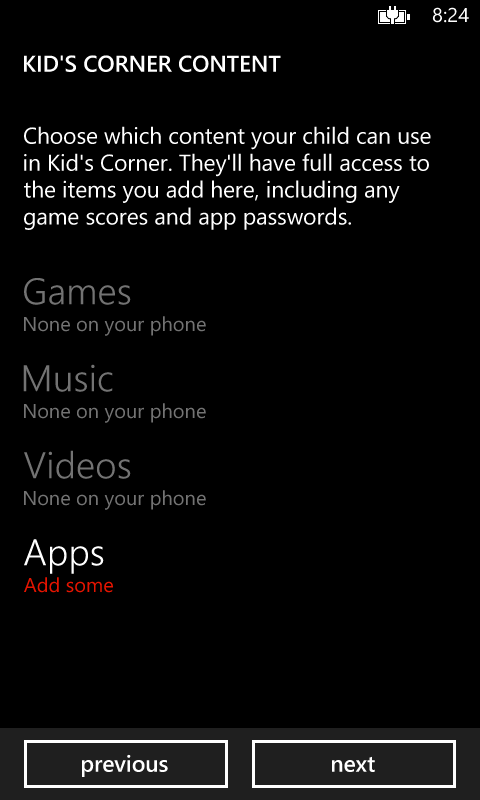
Once configured, Kid's Corner can be access by swiping left on the lock screen. Once the little-ones have played all the games you want, you can exit Kid's Corner by pressing power button. Once you're back to the familiar lock screen, enter your password to unlock the phone with full permissions.
Now where's a REAL device?
After about 10-minute I was staring at my newly un-remarkable WP7 Nokia 800 and wondering how I could get me hands on a Windows Phone 8 device. Sadly the news is not good. After all the waiting, anticipation and even more waiting, I still won't be able to get a device from my carrier (or any other carrier in Australia) for quite a while yet. My phone is out of contract and I am ready to buy, but neither love nor money will have me showing off a WP8 device any time soon to my Android totting colleagues. Damn, that Samsung ATIV S looks really great – shame it's exclusive to Optus (who chose to forget my neck-of-the-woods when building towers).
New size options for HubTiles
One of the main visual changes to the start screen in Windows Phone 7.8 and 8 is that it now supports three sizes of live tiles. The default (medium) tile is now larger and gone is the black strip to the right that used to be home to an arrow that took you to the app screen.
This milestone seemed like a good time to revisit the HubTile control from the Windows Phone Toolkit to see if it could support these new formats. The early versions on the HubTile is was a painful process to choose the size of the tile, having to resort to copying and modifying the XAML elements and animations, as discussed in the post.
Thankfully, since the September 2012 release of the Windows Phone Toolkit, the HubTile control now comes with a Size property that allows you to select from four sizes, Default, Small, Medium and Large. A look at the source code for this release reveals the size of each of these tiles.
switch (hubTile.Size)
{
    case TileSize.Default:
        hubTile.Width = 173;
        hubTile.Height = 173;
        break;

    case TileSize.Small:
        hubTile.Width = 99;
        hubTile.Height = 99;
        break;

    case TileSize.Medium:
        hubTile.Width = 210;
        hubTile.Height = 210;
        break;

    case TileSize.Large:
        hubTile.Width = 432;
        hubTile.Height = 210;
        break;
}
Using these new sizes with the data bound HubTile example we used in another post is simple. The easiest option is to specify the Size property in the ItemTemplate.
<ListBox Grid.Row="0" Name="AvatarListView">
    <ListBox.ItemsPanel>
        <ItemsPanelTemplate>
            <toolkit:WrapPanel Orientation="Horizontal" />
        </ItemsPanelTemplate>
    </ListBox.ItemsPanel>
    <ListBox.ItemTemplate>
        <DataTemplate>
            <toolkit:HubTile
		Margin="12,12,0,0"
		Title="{Binding Title}"
		Message="{Binding Message}"
		Source="{Binding ImageUri}"
                Size="Medium"/>
        </DataTemplate>
    </ListBox.ItemTemplate>
</ListBox>
Of course, you can also bind the Size property to property on your underlying data source. To do this, add a TileSize property to the HubTileItem class and modify the HubTile control XAML as below.
public class HubTileItem
{
    public string Title { get; set; }
    public string Message { get; set; }
    public Uri ImageUri { get; set; }
    public TileSize TileSize {get; set;}
}
<toolkit:HubTile
	Margin="12,12,0,0"
	Title="{Binding Title}"
	Message="{Binding Message}"
	Source="{Binding ImageUri}"
   	Size="{Binding TileSize}"/>
Using the Windows Phone Toolkit HubTile control
In the August 2011 release of the Windows Phone Toolkit a handy little control has been released that makes it easy to created rotating tiles similar to those that come on the Windows Phone start screen. In this demo, we'll cover how to add a HubTile control to your app and describe the various components of the HubTile.
First off, follow the instructions on CodePlex (http://silverlight.codeplex.com/) to install the Windows Phone Toolkit and create a new Windows Phone project in Visual Studio.
On the page where you want to use the HubTile, add an XML Namespace entry for the Toolkit.
xmlns:toolkit="clr-namespace:Microsoft.Phone.Controls;assembly=Microsoft.Phone.Controls.Toolkit"
The code to add a single HubTile to the page is as follows;
<toolkit:HubTile
    Title="Sam"
    Message="Yosemite Sam"
    Source="/Assets/Images/Yosemite-Sam.jpg"
    Background="{StaticResource PhoneAccentBrush}" />
Basic Properties
Title - Appears on both the front and flip-side of the tile (Sam)
Message - Appears at the top of the flip-side of the tile (Yosemite Sam)
Source - The image to display
Behaviour
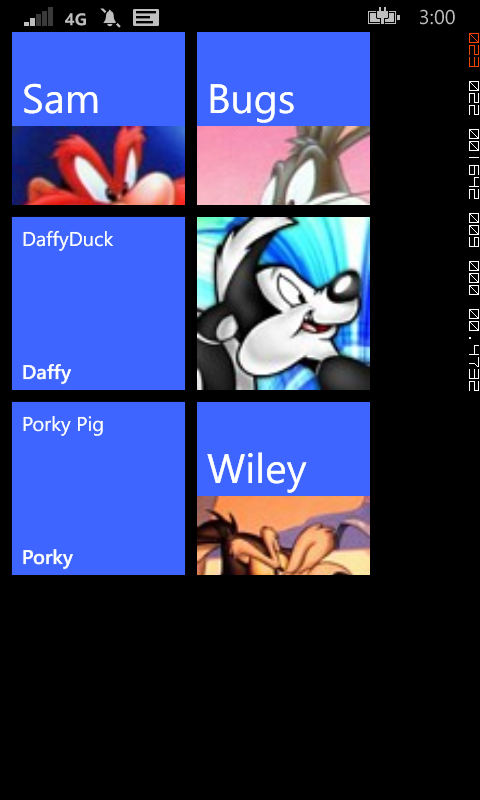
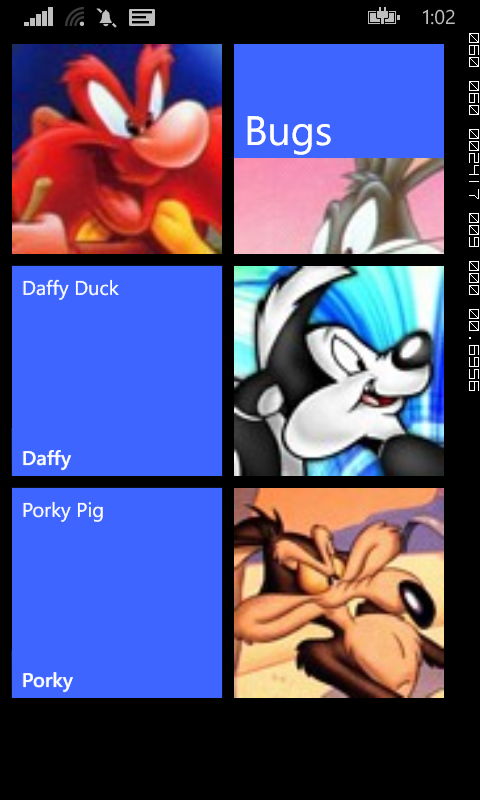
The HubTile cycles through a number of states as shown in the image below. These include displaying only the Source image, a split view of the Source and Title, the front-side view of the Title in large font and the flip-side view.

Obviously, one HubTile on it's own is not that exciting, but by wrapping a number of HubTiles in one of the XAML containers, such as a Grid or StackPanel, you'll soon be on the way to creating a Start Screen-like experience in your own app.
