Augmented Reality#3: Using the Geo AR (Augmented Reality) Toolkit
Now if you have been following along on some of my previous posts about Augmented Reality (AR), you’ll know that the Mango release of Windows Phone offers some great support for developers. So far we have looked at displaying the live video feed from the VideoBrush and also added some Accelerometer features to create a see-through spirit level.
With the release of the Geo Augmented Reality Toolkit (GART), many of the operations required to show geographical points in relation to the user’s current position have been greatly simplified.
First things first, you’ll need to download the GART binary from Codeplex. There are also a number of samples available for download which will help you on your way. Once you’ve downloaded and extracted the dll, you can add a reference to GART into your existing projects and be on your way to easier Augmented Reality apps.
Start a new Silverlight for Windows Phone – Windows Phone Application project in Visual Studio. Make sure to select Windows Phone 7.1 for the OS when you are offered the choice.
Add a reference to GART to your project and add a the following to you MainPage.xaml
xmlns:ARControls="clr-namespace:GART.Controls;assembly=GART"
You will also need to add a reference to System.Device to be able to include Location functionality, such as the GeoCoordinate class.
At the heart of GART is the ARDisplay control, which packages together a number of UI elements, as well as lots of complex calculations to make working with AR apps very easy. The first UI elements we will look at are the OverheadMap and WorldView components.
The OverheadMap element renders just like the regular Map control and displays a Bing map. The WorldView element displays the geographical points in three dimensional space and lies at the heart of any good AR app.
The simplest way to get started with GART is to start by adding a few GeoCoordinate points to the ARDisplay control and checking the results using the OverheadMap UI element. To achieve this, add the ARDisplay control to your MainPage.xaml.
<Grid x:Name="ContentPanel" Grid.Row="1" Margin="12,0,12,0">
    <ARControls:ARDisplay x:Name="ARDisplay" d:LayoutOverrides="Width">
        <ARControls:OverheadMap x:Name="OverheadMap" />
        <ARControls:WorldView x:Name="WorldView" />
    </ARControls:ARDisplay>
</Grid>
In the code behind, add a few points that you want to show as labels on your new AR app. If you are using the emulator your “current” location will be set to the Microsoft campus in Redmond, so make sure the points you select are located nearby. Currently the Worldview only shows points within 100 meters of your current location.
You can use the AddLabel code from the GART samples to display the GeoCoordinate points you create using this sort of code;
GeoCoordinate pt4 = new GeoCoordinate(47.64523, -122.14090);
AddLabel(pt4, "Studio E");
Now that we have some geographical points we want to display and have set the current location to use for the centre of the ARDisplay, all that is left is to tell the ARDisplay to start running - you can add this code the OnNavigateTo event if you always want to start the control.
protected override void OnNavigatedTo(System.Windows.Navigation.NavigationEventArgs e)
{
// Start AR services
ARDisplay.StartServices();
base.OnNavigatedTo(e);
}
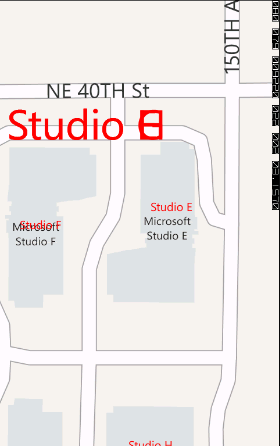
Run the project, but be warned, AR functionality is really only useful when testing on a real device. If you are using the emulator you will get the great map shown below, complete with some strange text that overlaps each other.

Adding a Map to your WP7 App
My recent TrafficMATE Windows Phone 7 app heavily utilised the Bing Maps control for WP7. It was used to plot route in combination with the Bing Maps Route Service API, as well as to show the location of traffic cameras.
The easiest way to get started with the Maps control for Windows Phone is to take a look at the tutorials found in the Labs provided by Microsoft. If you just want to throw up a map to display a single geographic point, then here’s how to start.
Add the control to your xaml
The Map control resides in the Microsoft.Phone.Controls.Maps library, so you will want to add a reference to this library into your project. You will also want to create a namespace reference in the XAML page where you want to use the map control.
xmlns:msmap="clr-namespace:Microsoft.Phone.Controls.Maps;assembly=Microsoft.Phone.Controls.Maps"
You can then add the map control to your xaml.
<msmap:Map x:Name="routeMap"
CredentialsProvider="{Binding CredentialsProvider}">
</msmap:Map>
Set your Bing Maps API key
To use the map you’ll need to get a key, which is free from Microsoft. Without a key, you will be stuck with the message Invalid Credentials Sign up for a developer account.
The API key is a single string, much like you may be familiar with if you have used the Google Maps API. The Map control makes it a little harder though and expects an object of the CredentialsProvider class. It’s easy enough to create a property in your .cs file that exposes a property of type CredentialsProvider and then bind that property to the map property.
private readonly CredentialsProvider _credentialsProvider = new ApplicationIdCredentialsProvider("Your Key");
public CredentialsProvider CredentialsProvider
{
get { return _credentialsProvider; }
}
Adding a pushpin to the map
The first thing you will want to do with your newly acquired map is to zoom to a certain location and display a pushpin. Thankfully there are a few ways to do this. The first is to programmatically add a pushpin to the map in your .cs file and zoom in.
The bare-bones approach to add a pushpin directly to the Map in your code is shown below.
Pushpin p = new Pushpin();
p.Location = new System.Device.Location.GeoCoordinate(51.42153, -0.20786);

//add the pushpin to the map
routeMap.Children.Add(p);
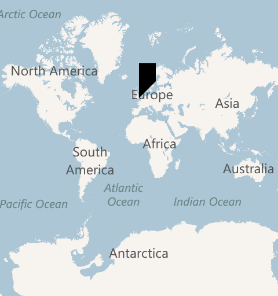
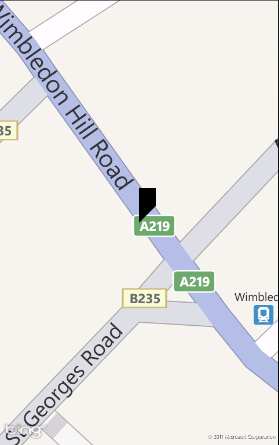
Compile and run the app and you will get a single pushpin, as shown below.

Just as you can add the pushpin in code-behind, you can also programmatically zoom the map to the chosen location, by setting the map’s Center and ZoomLevel properties. Set the zoom to an appropriate number between 1 and 19, where 19 is very close.
//set the center of the map and the zoom level
routeMap.Center = new System.Device.Location.GeoCoordinate(51.42153, -0.20786);
routeMap.ZoomLevel = 19;
