Responding to Windows Phone Toolkit HubTile Events
In a previous post we looked at how to include the metro-styled HubTile to your Windows Phone app. In this post, we'll discover how to perform an action when the user taps the tile.
The HubTile contains an event named Tap, which is triggered whenever the users touches the tile. This event can be handled in your code-behind to perform a task, such as navigating to a new page in your app.
XAML
<toolkit:HubTile
        Title="Sam"
        Message="Yosemite Sam"
        Source="/Assets/Images/Yosemite-Sam.jpg"
        Background="{StaticResource PhoneAccentBrush}"
        Tap="HubTile_Tap"/>
Code Behind
private void HubTile_Tap(object sender, System.Windows.Input.GestureEventArgs e)
{
    NavigationService.Navigate(new Uri("/DatailsPage.xaml", UriKind.Relative));
}
This solution works fine if you have a single HubTile, but what about if you have more than one HubTile, which really is the point of the control in the first place?
The good news is that there are a number of way you can handle multiple HubTile on a single page. Firstly, you could create separate handlers for each Tap event, like in the example below.
XAML
<toolkit:HubTile
        Title="Sam"
        Message="Yosemite Sam"
        Source="/Assets/Images/Yosemite-Sam.jpg"
        Background="{StaticResource PhoneAccentBrush}"
        Tap="HubTile1_Tap"/>
<toolkit:HubTile
        Title="Bugs"
        Message="Bugs Bunny"
        Source="/Assets/Images/Bugs-Bunny.jpg"
        Background="{StaticResource PhoneAccentBrush}"
        Tap="HubTile2_Tap"
    Margin="12,0,0,0"/>
Code Behind
private void HubTile1_Tap(object sender, System.Windows.Input.GestureEventArgs e)
{
    NavigationService.Navigate(new Uri("/DatailsPage1.xaml", UriKind.Relative));
}

private void HubTile2_Tap(object sender, System.Windows.Input.GestureEventArgs e)
{
    NavigationService.Navigate(new Uri("/DatailsPage2.xaml", UriKind.Relative));
}
This gives you a nice separation of concerns and makes it clear exactly what is going on, but it also means there's a lot of code.
Another option is to use the single event handler, but to somehow identify the actually HubTile that was tapped. The sender object in the HubTile Tap event is the HubTile that was tapped, so it is relatively easy to cast the sender but to a HubTile and retrieve whatever values you want to uniquely identify the HubTile.
The code below shows how easy it is to retrieve the HubTile's Title value and then use it in a switch statement to perform a different action for each HubTile.
private void HubTile_Tap(object sender, System.Windows.Input.GestureEventArgs e)
{
    HubTile tile = (HubTile)sender;
    MessageBox.Show(tile.Title);

    switch(tile.Title)
    {
        case "Sam":
            NavigationService.Navigate(new Uri("DetailsPage1.xaml",UriKind.Relative));
            break;
        case "Bugs":
            NavigationService.Navigate(new Uri("DetailsPage1.xaml",UriKind.Relative));
            break;
    }
}
Using the Windows Phone Toolkit HubTile control
In the August 2011 release of the Windows Phone Toolkit a handy little control has been released that makes it easy to created rotating tiles similar to those that come on the Windows Phone start screen. In this demo, we'll cover how to add a HubTile control to your app and describe the various components of the HubTile.
First off, follow the instructions on CodePlex (http://silverlight.codeplex.com/) to install the Windows Phone Toolkit and create a new Windows Phone project in Visual Studio.
On the page where you want to use the HubTile, add an XML Namespace entry for the Toolkit.
xmlns:toolkit="clr-namespace:Microsoft.Phone.Controls;assembly=Microsoft.Phone.Controls.Toolkit"
The code to add a single HubTile to the page is as follows;
<toolkit:HubTile
    Title="Sam"
    Message="Yosemite Sam"
    Source="/Assets/Images/Yosemite-Sam.jpg"
    Background="{StaticResource PhoneAccentBrush}" />
Basic Properties
Title - Appears on both the front and flip-side of the tile (Sam)
Message - Appears at the top of the flip-side of the tile (Yosemite Sam)
Source - The image to display
Behaviour
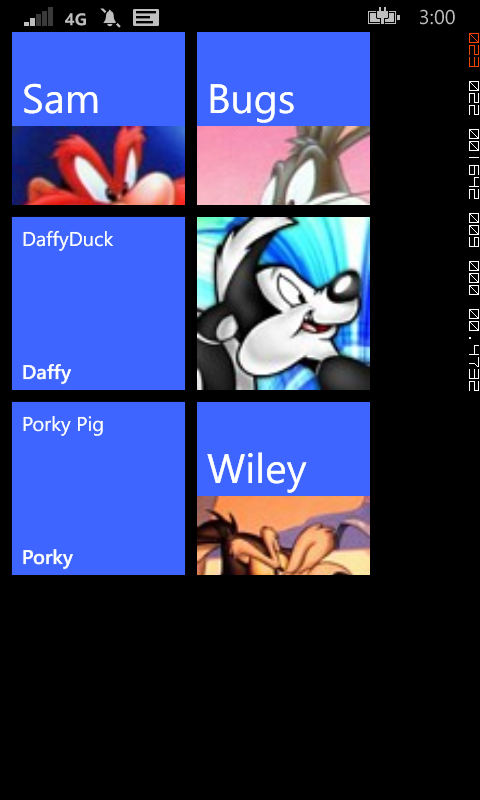
The HubTile cycles through a number of states as shown in the image below. These include displaying only the Source image, a split view of the Source and Title, the front-side view of the Title in large font and the flip-side view.

Obviously, one HubTile on it's own is not that exciting, but by wrapping a number of HubTiles in one of the XAML containers, such as a Grid or StackPanel, you'll soon be on the way to creating a Start Screen-like experience in your own app.
Getting Started with Starter Kit for Schools
Chris Koenig has just authored a nice little starter kit designed specifically for building a Windows Phone app that displays information about a school.
Once you have downloaded the latest package from github you should extract the zip file, which contains the sample project. Launch Visual Studio and open the MySchoolApp project from the C# folder. Build and run the application to check that everything compiles.
A quick read of the descriptionframe.html instructions located in the description folder is also helpful, as it lays out how to go about changing the default settings.
Most of the data is contained within the app's Data folder, so it's going to be a little painful to update, but certainly it's a good start. A more robust approach would be to create a WFC web service that would feed the relevant data. Having said that, unless your school, college or university changes every other day, the static content will probably suffice.
Adding a new set of links
The app also contains a number of collections of links that can be used to launch the browser and display some online content. Out of the box these are saved in Links.xml and Athletics.xml. It is pretty easy to add more link collections by creating and modifying a copy of these files.
For example you could create Arts.xml to showcase the Arts and Cultural aspects of your school.
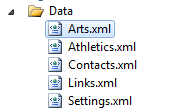
This might then contain XML such as shown below:
<links>
<link>
<url>http://contosouniversity.net</url>
<title>Top Arts News</title>
</link>
<link>
<url>http://contosouniversity.net</url>
<title>Choir News</title>
</link>
<link>
<url>http://contosouniversity.net</url>
<title>Orchestra News</title>
</link>
<link>
<url>http://contosouniversity.net</url>
<title>Theatre News</title>
</link>
</links>
Modify the ViewModel
The next step is to wire up the code so that you can use these links on the MainPage. To do this you need to make a few changes to the MainViewModel.cs file, located in the ViewModels folder.
First create a new property to expose your list of Arts related links
public ObservableCollection<Link> ArtsLinks { get; private set; }
Modify the constructor to instantiate a new instance of this property
this.ArtsLinks = new ObservableCollection<Link>();
Finally, modify the parseLinkFile method and include the code to load the links from Arts.xml.
parseLinkFile("/Data/Arts.xml").ForEach(x => ArtsLinks.Add(x));
Add a new PanoramaItem
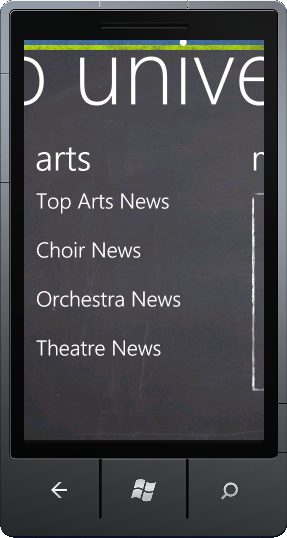
To display the new list of Arts links, open MainPage.xaml and copy the existing athletics PanoramaItem. You can then modify this code to point to our newly created ArtsLinks.
<controls:PanoramaItem Header="arts">
    <ListBox x:Name="artsListBox"
                Margin="0,0,-12,0"
                ItemsSource="{Binding ArtsLinks}"
                ItemTemplate="{StaticResource LinkDataTemplate}"
                SelectionChanged="ListBox_SelectionChanged"/>
</controls:PanoramaItem>
Compile and run the app to see your new Arts links.
Building a Windows Phone 7 Look-a-like
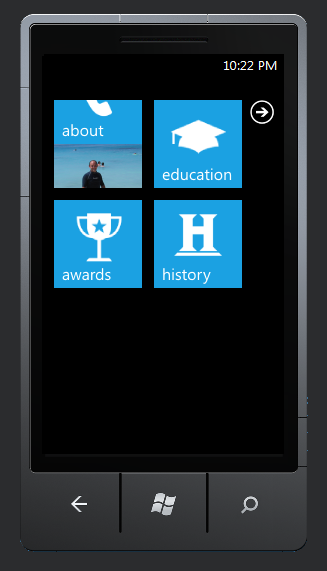
After viewing some of the fan-mail for Sahas Katta's WP7 resume, I decided to check out just how hard it would be to build a WP7/Metro inspired website. While both Sahas' and my own attempts are not exactly perfect mirrors of the Windows Phone 7 end-user experience, it was certainly an interesting experiment.
Has your boss already bought you an Android? Are you stuck with an iPhone? Do you really wish you could experience a Windows Phone without parting with your hard-earned cash?
Well here is your solution. Take a look at this Windows Phone 7 (Mango-release) inspired site .
The site is constructed using some screenshots from the WP7 emulator and the layout is true to the actual device - trust me, I have spent enough time developing for WP7 that I know these proportions off-by-heart.
WP7 Mango Features #4: ShareStatusTask
Ok, so it has only been a few weeks since I signed up for my first twitter account, and yes that was only after some very serious persuasion by Emily, the Spotlight2011 Program Manager, but I couldn’t help but have a play with the new Windows Phone Mango release Social Tasks.
The ShareStatusTask does nothing when running under the emulator, this is because is relies on the social networks you have linked to your phone’s Live account. Obviously, the emulator does not have a Live account associated with it, so you really need to test this out on a real phone.
private void Button_Click(object sender, RoutedEventArgs e)
{
//the sharestatustask will not work in the emulator as it needs your social network account details
ShareStatusTask shareStatusTask = new ShareStatusTask();
shareStatusTask.Status = "Testing some great features for our mango release";
shareStatusTask.Show();
}
I did, and I can report that after clicking the button on the app, a screen containing both the message and a list of social networks to post to was displayed. The user can easily select one or more of the social networks, such as Live, Twitter and Facebook. By default, all networks are selected, so you simply need to unselect the accounts you don’t want to post to. The user can also change the text being sent, or even cancel posting the status update. As with the EmailComposeTask in NoDo we see Microsoft continuing the policy that the user must always have the ability to cancel or amend the message before it is sent, making sure that any app you install won’t start randomly messaging everyone you know.
Anyway, here are the results from posting an update to Twitter using the TrafficmateWP account.
WP7 Mango Features #3: Bing Search
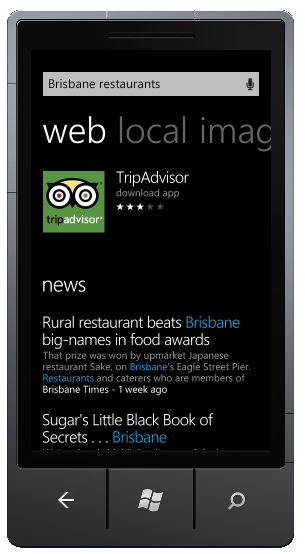
While on the subject of all things Bing and following on from recent posts on the new Bing Maps Tasks available to developers in the Windows Phone Mango release, I noticed another feature, called the SearchTask, is still alive and well from WP 7.0.
Although I hadn't needed to use the SearchTask previously, after a brief experiment I realised that this is another easy way to access some of the great Bing features on Windows Phone. The SearchTask, as the name suggests, launches the newly revised Bing Search app – you know the app that always stars when you accidently hit the ‘search’ button on your phone! This time however, as a developer you can actually launch this app and set the search string so that the user is taken straight to the relevant results.
private void Button_Click(object sender, RoutedEventArgs e)
{
    SearchTask search = new SearchTask();

    search.SearchQuery = "Brisbane restaurants";
    search.Show();
}
WP7 Mango Features #2: BingMapsDirectionTask
In the previous post I covered the new Bing Maps Tasks available to developers in the Mango release for Windows Phone. In that post I showed you how to use the search task to located business or point of interest matching your search term. In this post we will cover the other new feature, the BingMapsDirectionTask. Again this is a huge time-saver for anyone who has ever tried to use the Bing Maps API and built a ‘get directions’ page from scratch.
Follow the instructions in the previous post to get started. Once you have all the references sorted, create a new button and code its OnClick event to the following.
The BingMapsDirectionsTask requires either the start or end location to be explicitly set, and it will use the device location for the one you do not specify. Of course in the emulator, you will want to set both values.
As with the BingMapsTask, you only require a few lines of code to gain access to all the goodness of the built-in Bing Maps application.
private void Button_Click(object sender, RoutedEventArgs e)
{
BingMapsDirectionsTask directions = new BingMapsDirectionsTask();
//your must specify either the start or end locations
//if you leave one of these empty, Bing will use the current location
//if using the emulator simply specify both start and end
directions.Start = new LabeledMapLocation("Home", new GeoCoordinate(-27.31063, 152.99032));
directions.End = new LabeledMapLocation("Work", new GeoCoordinate(-27.46868, 153.02105));
directions.Show();
}
One interesting thing I noticed after accidently swapping a few numbers in the Start lat/long was that I ended up on Stradbroke Island. Not deterred by my error, Bing actually directed me to the ferry terminal and even included a helpful message ‘check the timetable’.
Making phone calls from your WP7 App
Now while there are tons of great things you can do with a Smart Phone, let’s not forget that at the end of the day, it is a phone. Thankfully, Windows Phone gives developers a couple of easy methods to select contacts and make phone calls. This is extremely useful in app where you provide a list of businesses and you want to provide a way for users to call them directly from you app.
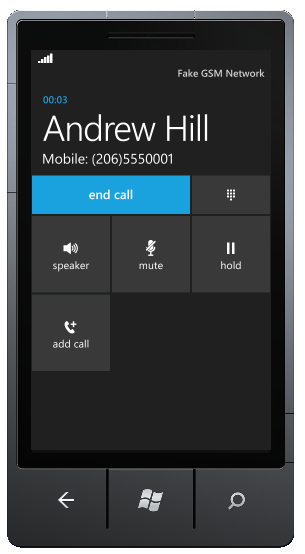
As with other Launcher tasks we’ve looked at, such as EmailComposeTask and WebBrowserTask, the code is very simple. Give the PhoneCallTask a phone number and a display name, and the native phone call app takes over.
private void Button_Click(object sender, RoutedEventArgs e)
{
    PhoneCallTask call = new PhoneCallTask();
    call.DisplayName = "Pizza Works";
    call.PhoneNumber = "555 1234";
    call.Show();
}
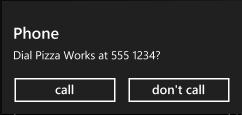
As with many tasks, the user confirms that they want to carry out the selected task. This give them the peace of mind of knowing that they can click around in your app and wont suddenly start a phone call.
Another related feature is the PhoneNumberChooserTask. Unlike launcher tasks, chooser tasks use a native OS app to return values back to your app. We’ve seen them at work in the CameraCaptureTask and PhotoChooserTasks that return an image back to your application. The PhoneNumberChooserTask as you would expect, enables the user to select a contact from phone’s contact application and returns their name and phone number, so that your app can then use the PhoneCallTask to initiate a phone call.
Then main difference in the code for a chooser task is that we have to wire up the Completed event, which is triggered when the user either selects a contact, or cancel out of the contact application.
private void Button_Click(object sender, RoutedEventArgs e)
{
PhoneNumberChooserTask phone = new PhoneNumberChooserTask();
phone.Completed += new EventHandler<PhoneNumberResult>(phone_Completed);
phone.Show();
}
void phone_Completed(object sender, PhoneNumberResult e)
{
//only continue if the user selected a contact
if (e.TaskResult == TaskResult.OK)
{
PhoneCallTask call = new PhoneCallTask();
//e.DisplayName is not returned prior to Mango
call.DisplayName = e.DisplayName;
call.PhoneNumber = e.PhoneNumber;
call.Show();
}
}
