Resizing the HubTile Control
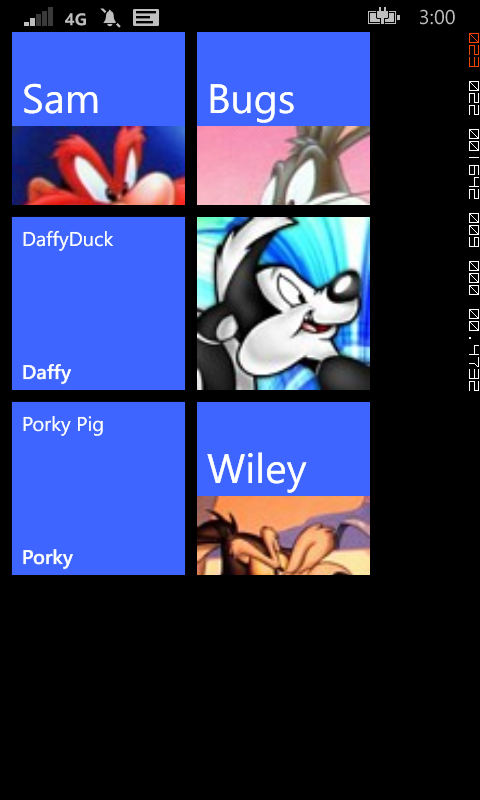
One common task is to make the HubTile larger, to provide better proportions on a single page. The original HubTile is modelled after the live tiles on the Windows Phone 7 start screen, so it was set at a size of 173x173. This works fine on the start screen, but on a single page inside your app it will feel a little awkward with the blank space on the right hand side.
In Blend, right click on the AvatarListView in the Objects and Timeline panel. Edit Additional Template - Edit Generated Items (ItemTemplate) - Edit a Copy. Give your template a name (AvatarItemTemplate) and accept the default to define it in the current document.
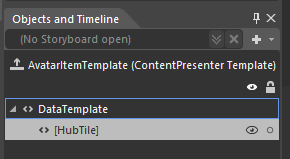
Next, right click on the HubTile element in the Objects and Timeline panel and choose Edit Template - Edit a copy and name it AvatarHubTileStyle.
This will create a new control template based on the original HubTile. Your AvatarHubTileStyle will contain a number of elements as shown in the picture below.
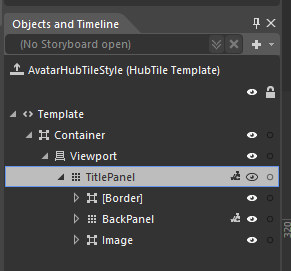
If you click on the TitlePanel element, you see that the magic of the HubTile is really just made up of three different elements a Border, BackPanel (a Grid) and an Image (inside a Border). Animations are used to move and flip these elements to give them the "Live Tile" feel.
Now that you have your own version of the HubTile to play with, you are only limited by your imagination as to how you want it to be rendered.
DataBinding HubTiles
In an earlier post I looked at adding data binding to a single HubTile control. In this post I'm going to take that to the next logical step and show you how to use data binding to create a dynamic set of HubTiles.
Like every Windows Phone control, it is possible to bind the properties of the HubTile control to values in a DataSource, such as a List or ObservableCollection. These DataSources could be located in the ViewModel portion of your app if you are using the MVVM pattern, but for this example we’ll bind our HubTiles to a local List.
We'll reuse the HubTileItem class we built in the earlier post, but instead of creating just one item, we'll be building and data binding to a List<HubTileItem> object. The easy way to do this is to declare a local List and then call a method that populates this List with values when the page loads.
Firstly, create a property named HubTiles, which will be of type List<HubTileItem>. This will hold our HubTileItems and will be used to data bind to the ListView.
private List<HubTileItem> hubTiles;
public List<HubTileItem> HubTiles
{
    get { return hubTiles; }
}
Next, create a method to add some items into our List of HubTileItems and call this method in the page constructor.
// Constructor
public MainPage()
{
    InitializeComponent();

    PopulateHubTiles();
}

private void PopulateHubTiles()
{
    hubTiles = new List<HubTileItem>();

    hubTiles.Add(
        new HubTileItem
        {
            Title = "Sam",
            Message = "Yosemite Sam",
            ImageUri = new Uri("/Assets/Images/Yosemite-Sam.jpg", UriKind.Relative)
        });

 ...
    hubTiles.Add(
        new HubTileItem
        {
            Title = "Wiley",
            Message = "Wiley Coyote",
            ImageUri = new Uri("/Assets/Images/Wiley-Coyote.jpg", UriKind.Relative)
        });
}
In XAML, create a new ListBox and add our data-bound HubTile to its ItemTemplate.
<ListBox Grid.Row="0" Name="AvatarListView">
    <ListBox.ItemTemplate>
        <DataTemplate>
            <toolkit:HubTile Margin="12,12,0,0" x:Name="MyHubTile"
                        Title="{Binding Title}"
                        Message="{Binding Message}"
                        Source="{Binding ImageUri}">
            </toolkit:HubTile>
        </DataTemplate>
    </ListBox.ItemTemplate>
</ListBox>
Once again we'll override the OnNavigatedTo event and add the code to assign our List property as the ItemsSource for the ListView.
protected override void OnNavigatedTo(NavigationEventArgs e)
{
    AvatarListView.ItemsSource = HubTiles;
    base.OnNavigatedTo(e);
}
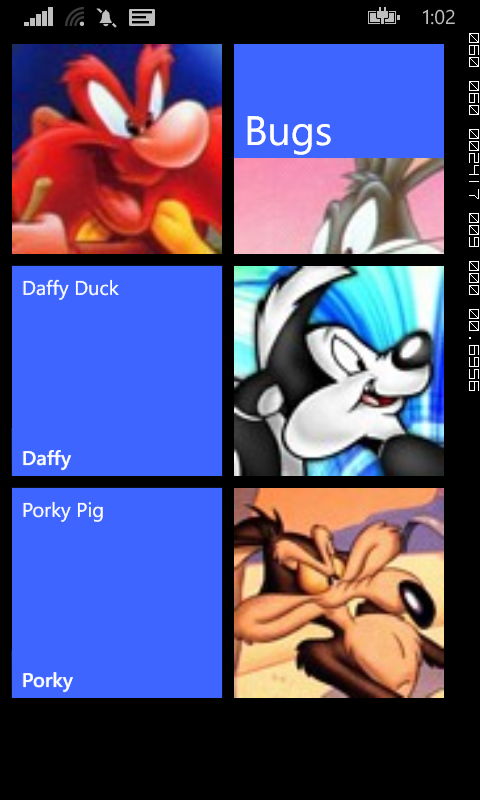
Run the app and you should see a nice list of HubTiles running down the page.

The long list of HubTiles is probably not what you were expecting, but thankfully the Windows Phone Toolkit provides another control, called the WrapPanel that we can use to layout our tiles in a more visually appealing manner.
The WrapPanel is much like a StackPanel, but lays out items in both directions, that is Top-Bottom and Left-Right.
To utilise the WrapPanel in our ListView, all we need to do is add it as the ItemsPaneltemplate and set the orientation to Horizontal. The WrapPanel with then lay out the HubTiles Left-Right, then downwards.
<ListBox Grid.Row="0" Name="AvatarListView">
    <ListBox.ItemsPanel>
        <ItemsPanelTemplate>
            <toolkit:WrapPanel Orientation="Horizontal" />
        </ItemsPanelTemplate>
    </ListBox.ItemsPanel>
    <ListBox.ItemTemplate>
        <DataTemplate>
            <toolkit:HubTile Margin="12,12,0,0" x:Name="MyHubTile"
                        Title="{Binding Title}"
                        Message="{Binding Message}"
                        Source="{Binding ImageUri}">
            </toolkit:HubTile>
        </DataTemplate>
    </ListBox.ItemTemplate>
</ListBox>
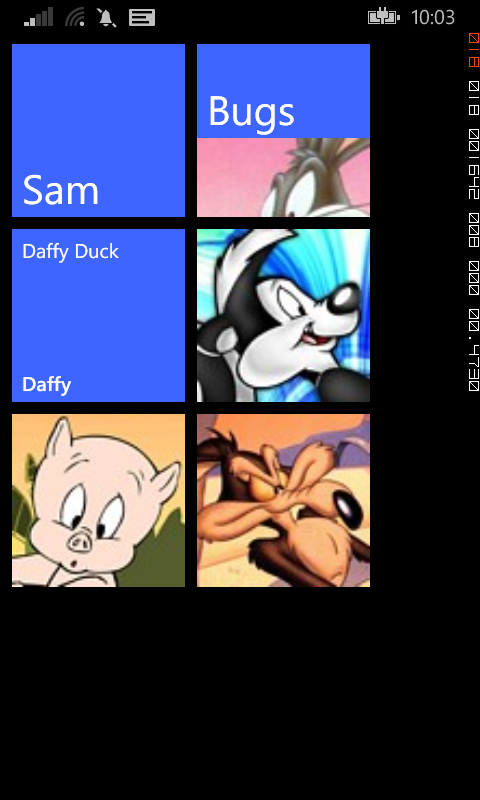
The result will be a nice little grid of HubTiles that will no-doubt make your app the talk of the town.
DataBinding a single HubTile
A little while ago I did a series of posts showing you how to build a Metro-styled start page for our app using HubTile controls from the Windows Phone Toolkit. In those examples, we built up the structure of the page in XAML alone. This approach may be fine for a static list of items, such as a page used for navigating to other pages in your app, but it becomes problematic when we want to display dynamic data, such as values created by the user.
To add data binding to the single HubTile control we created in this earlier post, we need to make a few changes to the XAML and C# code-behind. The first step is to create a new class representing the object we want to bind to the HubTile. In this example we'll just create a simple object HubTileItem with the required properties, but this could be any relevant business object you want to display.
public class HubTileItem
{
    public string Title { get; set; }
    public string Message { get; set; }
    public Uri ImageUri { get; set; }

}
If you're familiar with XAML DataBinding in general, the changes to our HubTile control will be pretty straightforward. Basically we want to replace the hardcoded values for Title, Message and Source with their appropriate properties from their DataSource. We'll also give our HubTile a name, so that we can refer to it from our C# code-behind.
<toolkit:HubTile Margin="12,12,0,0" x:Name="MyHubTile"
            Title="{Binding Title}"
            Message="{Binding Message}"
            Source="{Binding ImageUri}">
</toolkit:HubTile>
The last step is to create a new object of type HubTileItem and assign it as the DataContext for the HubTile control. To do this, we'll override the OnNavigatedTo event and include the code to create and assign the HubTileItem.
protected override void OnNavigatedTo(NavigationEventArgs e)
{
    HubTileItem item = new HubTileItem
    {
        Title = "Sam",
        Message = "Yosemite Sam",
        ImageUri = new Uri("/Assets/Images/Yosemite-Sam.jpg", UriKind.Relative)
    };

    MyHubTile.DataContext = item;

    base.OnNavigatedTo(e);
}
Run your app and your newly data bound HubTile should display exactly the same as it did before.
New size options for HubTiles
One of the main visual changes to the start screen in Windows Phone 7.8 and 8 is that it now supports three sizes of live tiles. The default (medium) tile is now larger and gone is the black strip to the right that used to be home to an arrow that took you to the app screen.
This milestone seemed like a good time to revisit the HubTile control from the Windows Phone Toolkit to see if it could support these new formats. The early versions on the HubTile is was a painful process to choose the size of the tile, having to resort to copying and modifying the XAML elements and animations, as discussed in the post.
Thankfully, since the September 2012 release of the Windows Phone Toolkit, the HubTile control now comes with a Size property that allows you to select from four sizes, Default, Small, Medium and Large. A look at the source code for this release reveals the size of each of these tiles.
switch (hubTile.Size)
{
    case TileSize.Default:
        hubTile.Width = 173;
        hubTile.Height = 173;
        break;

    case TileSize.Small:
        hubTile.Width = 99;
        hubTile.Height = 99;
        break;

    case TileSize.Medium:
        hubTile.Width = 210;
        hubTile.Height = 210;
        break;

    case TileSize.Large:
        hubTile.Width = 432;
        hubTile.Height = 210;
        break;
}
Using these new sizes with the data bound HubTile example we used in another post is simple. The easiest option is to specify the Size property in the ItemTemplate.
<ListBox Grid.Row="0" Name="AvatarListView">
    <ListBox.ItemsPanel>
        <ItemsPanelTemplate>
            <toolkit:WrapPanel Orientation="Horizontal" />
        </ItemsPanelTemplate>
    </ListBox.ItemsPanel>
    <ListBox.ItemTemplate>
        <DataTemplate>
            <toolkit:HubTile
		Margin="12,12,0,0"
		Title="{Binding Title}"
		Message="{Binding Message}"
		Source="{Binding ImageUri}"
                Size="Medium"/>
        </DataTemplate>
    </ListBox.ItemTemplate>
</ListBox>
Of course, you can also bind the Size property to property on your underlying data source. To do this, add a TileSize property to the HubTileItem class and modify the HubTile control XAML as below.
public class HubTileItem
{
    public string Title { get; set; }
    public string Message { get; set; }
    public Uri ImageUri { get; set; }
    public TileSize TileSize {get; set;}
}
<toolkit:HubTile
	Margin="12,12,0,0"
	Title="{Binding Title}"
	Message="{Binding Message}"
	Source="{Binding ImageUri}"
   	Size="{Binding TileSize}"/>
Adding Tap animation to the HubTile
In the previous post we looked at how you can use the HubTile control from the Windows Phone Toolkit to perform various navigation tasks.
One thing you may have noticed is that when you tap the HubTile, it doesn't move like the Live Tiles on the Windows Phone Start Screen. The easy fix for this is to add a TiltEffect, a component of the same Toolkit to the HubTile. The TiltEffect is an easy way to add that slight 'wiggle' you expect when pressing items in the ListView, so it seems like the perfect candidate.
There are a number of ways to add TiltEffect to the HubTile, but by far the easiest is to add it directly to control, such as in the example below;
<toolkit:HubTile
        toolkit:TiltEffect.IsTiltEnabled="True"
        Title="Sam"
        Message="Yosemite Sam"
        Source="/Assets/Images/Yosemite-Sam.jpg"
        Background="{StaticResource PhoneAccentBrush}"
        Tap="HubTile_Tap"/>
If you run the page and test the HubTile you'll notice that the animation does not appear to work. That's because for some reason, the HubTile is not included in the list of items that TiltEffect applies to. Thankfully, the solution is easy. In your code-behind you can manually add the HubTile to the TiltableItems list.
public MainPage()
{
    InitializeComponent();

    TiltEffect.TiltableItems.Add(typeof(HubTile));

}
Responding to Windows Phone Toolkit HubTile Events
In a previous post we looked at how to include the metro-styled HubTile to your Windows Phone app. In this post, we'll discover how to perform an action when the user taps the tile.
The HubTile contains an event named Tap, which is triggered whenever the users touches the tile. This event can be handled in your code-behind to perform a task, such as navigating to a new page in your app.
XAML
<toolkit:HubTile
        Title="Sam"
        Message="Yosemite Sam"
        Source="/Assets/Images/Yosemite-Sam.jpg"
        Background="{StaticResource PhoneAccentBrush}"
        Tap="HubTile_Tap"/>
Code Behind
private void HubTile_Tap(object sender, System.Windows.Input.GestureEventArgs e)
{
    NavigationService.Navigate(new Uri("/DatailsPage.xaml", UriKind.Relative));
}
This solution works fine if you have a single HubTile, but what about if you have more than one HubTile, which really is the point of the control in the first place?
The good news is that there are a number of way you can handle multiple HubTile on a single page. Firstly, you could create separate handlers for each Tap event, like in the example below.
XAML
<toolkit:HubTile
        Title="Sam"
        Message="Yosemite Sam"
        Source="/Assets/Images/Yosemite-Sam.jpg"
        Background="{StaticResource PhoneAccentBrush}"
        Tap="HubTile1_Tap"/>
<toolkit:HubTile
        Title="Bugs"
        Message="Bugs Bunny"
        Source="/Assets/Images/Bugs-Bunny.jpg"
        Background="{StaticResource PhoneAccentBrush}"
        Tap="HubTile2_Tap"
    Margin="12,0,0,0"/>
Code Behind
private void HubTile1_Tap(object sender, System.Windows.Input.GestureEventArgs e)
{
    NavigationService.Navigate(new Uri("/DatailsPage1.xaml", UriKind.Relative));
}

private void HubTile2_Tap(object sender, System.Windows.Input.GestureEventArgs e)
{
    NavigationService.Navigate(new Uri("/DatailsPage2.xaml", UriKind.Relative));
}
This gives you a nice separation of concerns and makes it clear exactly what is going on, but it also means there's a lot of code.
Another option is to use the single event handler, but to somehow identify the actually HubTile that was tapped. The sender object in the HubTile Tap event is the HubTile that was tapped, so it is relatively easy to cast the sender but to a HubTile and retrieve whatever values you want to uniquely identify the HubTile.
The code below shows how easy it is to retrieve the HubTile's Title value and then use it in a switch statement to perform a different action for each HubTile.
private void HubTile_Tap(object sender, System.Windows.Input.GestureEventArgs e)
{
    HubTile tile = (HubTile)sender;
    MessageBox.Show(tile.Title);

    switch(tile.Title)
    {
        case "Sam":
            NavigationService.Navigate(new Uri("DetailsPage1.xaml",UriKind.Relative));
            break;
        case "Bugs":
            NavigationService.Navigate(new Uri("DetailsPage1.xaml",UriKind.Relative));
            break;
    }
}
Using the Windows Phone Toolkit HubTile control
In the August 2011 release of the Windows Phone Toolkit a handy little control has been released that makes it easy to created rotating tiles similar to those that come on the Windows Phone start screen. In this demo, we'll cover how to add a HubTile control to your app and describe the various components of the HubTile.
First off, follow the instructions on CodePlex (http://silverlight.codeplex.com/) to install the Windows Phone Toolkit and create a new Windows Phone project in Visual Studio.
On the page where you want to use the HubTile, add an XML Namespace entry for the Toolkit.
xmlns:toolkit="clr-namespace:Microsoft.Phone.Controls;assembly=Microsoft.Phone.Controls.Toolkit"
The code to add a single HubTile to the page is as follows;
<toolkit:HubTile
    Title="Sam"
    Message="Yosemite Sam"
    Source="/Assets/Images/Yosemite-Sam.jpg"
    Background="{StaticResource PhoneAccentBrush}" />
Basic Properties
Title - Appears on both the front and flip-side of the tile (Sam)
Message - Appears at the top of the flip-side of the tile (Yosemite Sam)
Source - The image to display
Behaviour
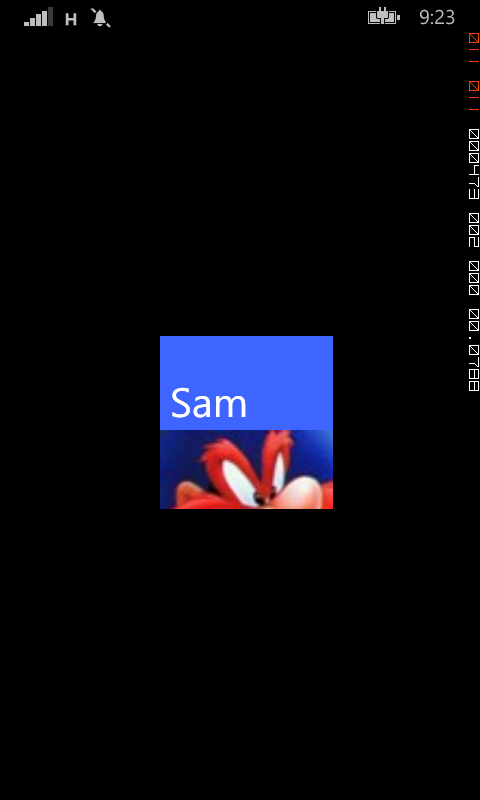
The HubTile cycles through a number of states as shown in the image below. These include displaying only the Source image, a split view of the Source and Title, the front-side view of the Title in large font and the flip-side view.

Obviously, one HubTile on it's own is not that exciting, but by wrapping a number of HubTiles in one of the XAML containers, such as a Grid or StackPanel, you'll soon be on the way to creating a Start Screen-like experience in your own app.
