Publish a VueJS or React Application to Azure
Create an Azure Web App
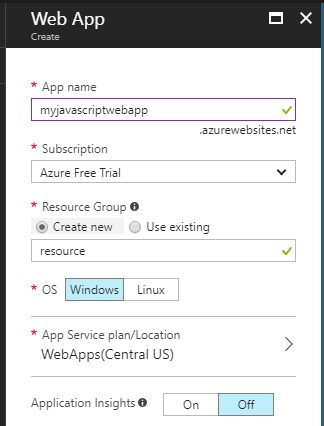
Log into the Azure portal.
Select App Services from the left-hand menu, then choose Add.
From the Web + Mobile application list, choose Web App. Give you app a name, this will become part of the URL, for example mywebapp.azurewebsites.net.
Create a Release Definition
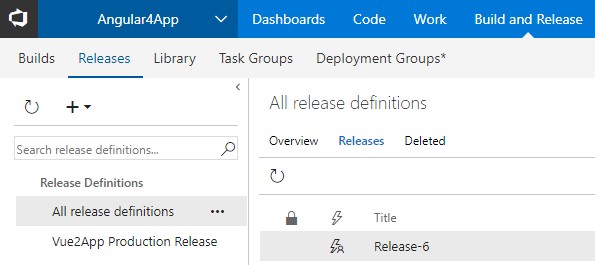
Log into Visual Studio Team Services and open your project.
Open the Build and Releases section and ensure you are on the Releases tab. Click the + and select Create release definition.
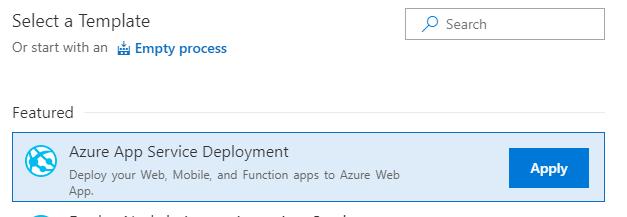
From the Select a Template section, choose Azure App Service Deployment and click Apply.
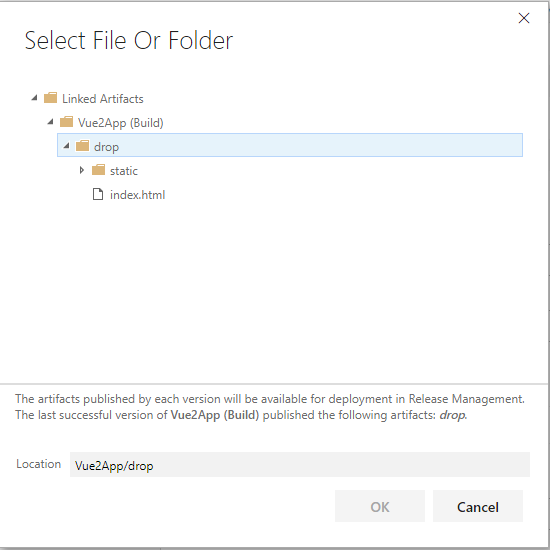
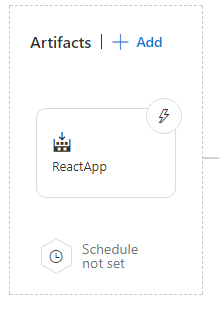
Click on the Artifacts link to add the artifacts from your Build process.

Click on the Phase and Tasks link under Environment 1 and give your environment a name, such as Production or Test.
Enter in the relevant details for your Azure account and the App Service you created above.
Click on the Deploy Azure App Service task and focus on the Package or Folder field. Browse to 'drop' folder of your build artifacts.
Save your changes. Back in the Releases page, click the ellipses beside you new release definition and select Release.
Adding Continuous Deployment
Now that your release has been tested and is working, it's time to add CD support, so that whenever a new build is available, Team Services will deploy your app.
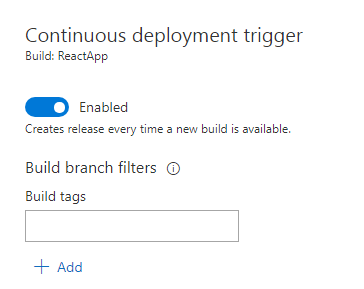
Open the release definition and click the lightning bolt at the top of the Artifacts tab.
Toggle Enable on the Continuous deployment trigger section.
Building a VueJS or React application with Continuous Integration
Publishing your new VueJA or React app to Azure is very easy using the Build and Release tools that are available in Visual Studio Team Services. The steps below can be used to publish your app directly from your Git repository to an Azure Web App. Enabling Continuous Integration means that whenever you push a commit to Git, a build will be triggered.
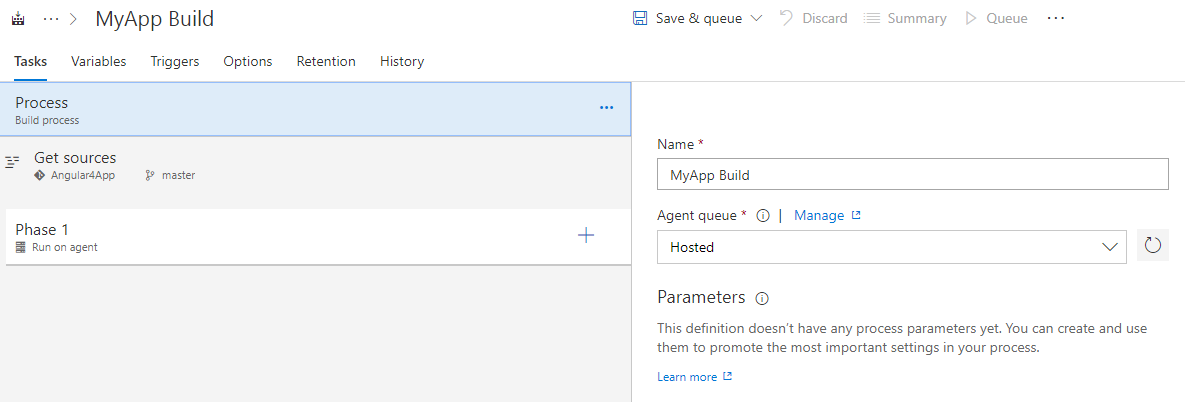
Create a Build Definition
Log into Visual Studio Team Services and create open your project.
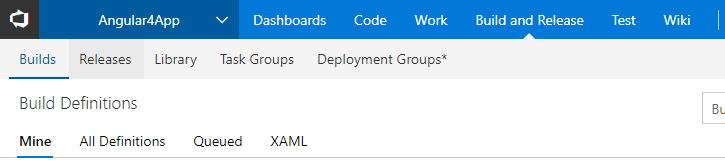
Open the Build and Releases section and ensure you are on the Builds tab. Click New and select Empty Process, as we'll add the build tasks ourselves.
Within the Process sections, give your build a name and choose 'Hosted' as the Agent queue.
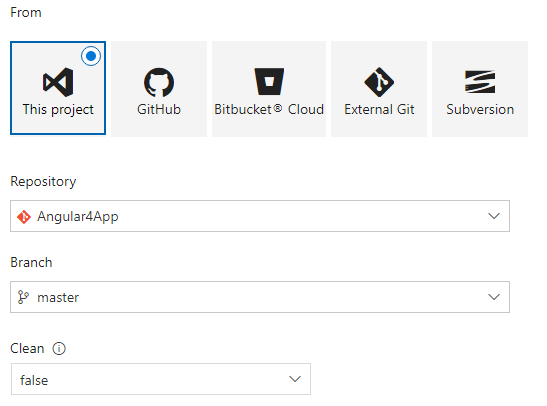
Click on the Get Sources section and either accept the 'This Project' option, or choose another source. Note that your code does not have to be stored in Team Services, for example you can use a Git repository.
Click on Phase one and create the following Tasks.
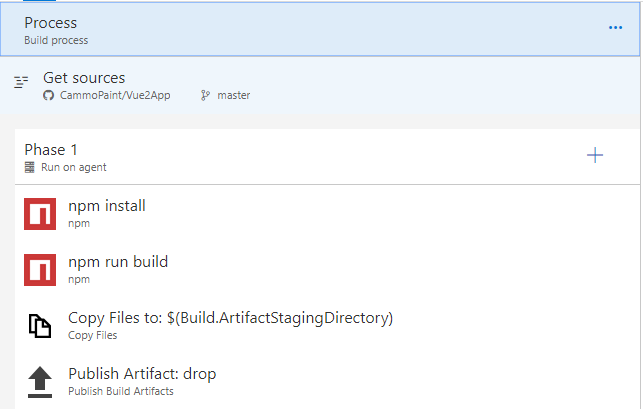
Step 1. Ensures all dependencies for your app are installed
Task Type: npn
Command: install
Step 2. Runs the relevant build script to create the files required to be deployed
Task Type: npn
Command: custom
Command and arguments: run build
Step 3. Copy the build output files
Task Type: Copy Files
Target Folder: $(Build.ArtifactStagingDirectory)
Step 4. Publish the build artifacts
Task Type: Publish Build Artifacts
Path to publish: $(Build.ArtifactStagingDirectory)
Artifact name: drop
Save and queue the build to ensure that all the steps run successfully.
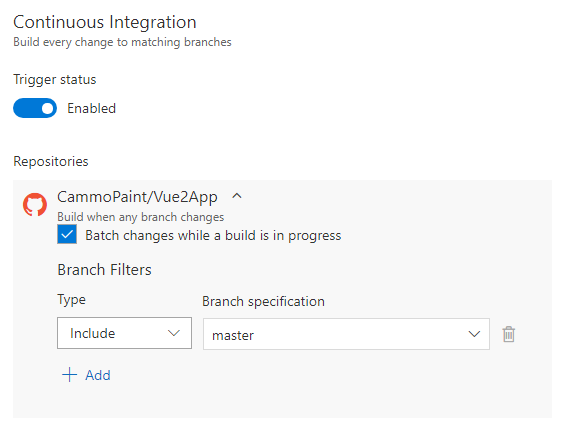
Enabling Continuous Integration
Now that you build has been tested and works, you can enable CI. Open the build definition and choose the Triggers tab. Enable the Continuous Integration trigger and choose the branch to watch for commits.