Creating a Simple Collection Class
Creating a group of objects that share common properties if one of the key features of Object Orientated programming. An object may represent real-life 'things' such as a person or vehicle, or business related objects such as a documents or reports. One of the simplest ways to create and retrieve such as group of objects is to create a Class in .NET.
Creating a Class
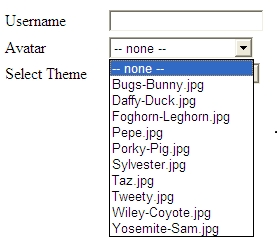
Our sample class represents Avatar images that can be associated with users of our website. We will use the image name as the name of the Avatar and all the images are located in the same folder on the web server.[hotellink:brisbane]
Select Add New Item from the Visual Studio IDE and create a new Class called Avatar. Visual Studio will create the shell for our new class, which includes a number of default Namespaces as well as the constructor for Avatar.
using System;
using System.Data;
using System.Configuration;
using System.Web;
using System.Web.Security;
using System.Web.UI;
using System.Web.UI.WebControls;
using System.Web.UI.WebControls.WebParts;
using System.Web.UI.HtmlControls;
/// <summary>
/// Summary description for Avatar
/// </summary>
public class Avatar
{
public Avatar()
{
//
// TODO: Add constructor logic here
//
}
}
As you already know methods in .NET can be overloaded. This means that we can create any number of public Avatar() methods depending on how we want the class to be called. In our example we will allow two ways to create a new Avatar, the first where the name will be set after the object is created and a second where the name is included in the initial call.
Add a private variable to the class that will hold the avatar name a new Property to enable the calling function to get and set the value of this variable. We could set the local variable _name to public so that we could access its value directly, however it is often better to wrap these values as Properties, so that we can add an validation or custom handling that may be required.
public class Avatar
{
private string _name;
....
public string Name
{
get { return _name;}
set { _name = value; }
}
}
We can know create a second constructor for Avatar with a parameter that sets the value of Name.
public Avatar(string AvatarName)
{
this.Name = AvatarName;
}
Create a Collection
A single Avatar object is not particularly useful, so we will build another class that enables us to quickly and easily add and remove Avatars to a list, or Collection. [silverlightslideshow:example]
Create a new Class called AvatarCollection. As we want this class to act as a collection of objects we need to ensure it inherits from System.Collections.CollectionBase.
using System;
using System.Data;
using System.Configuration;
using System.Web;
using System.Web.Security;
using System.Web.UI;
using System.Web.UI.WebControls;
using System.Web.UI.WebControls.WebParts;
using System.Web.UI.HtmlControls;
/// <summary>
/// Summary description for AvatarCollection
/// </summary>
public class AvatarCollection : System.Collections.CollectionBase
{
public AvatarCollection()
{
//
// TODO: Add constructor logic here
//
}
}
A simple collection needs to have functionality to add new items. remove a particular item and to return or retrieve a particular item. To enable this we add some very simple methods called Add, Remove and Item.
public void Add(Avatar av)
{
List.Add(av);
}
public void Remove(int index)
{
List.RemoveAt(index);
}
public Avatar Item(int index)
{
return (Avatar)List[index];
}
The Add method take an Avatar object as a parameter and adds it to the List (or Collection) or objects. As expected, the Remove method removes whatever object is located at the specified index position. Likewise the Item method returns an Avatar object located at the specified index position, notice that we have to explicitly cast the object to an Avatar as List can contain any object type.
In our example, we would like to create a method that pre-populates the List with all Avatars located within a specific folder on the web server. We can again overload the constructor AvatarCollection to call whatever methods we require.
public AvatarCollection(string FolderName)
{
GetAvatars(FolderName);
}
public void GetAvatars(string FolderName)
{
//retrieve an array of files from the directory
DirectoryInfo dir = new DirectoryInfo(System.Web.HttpContext.Current.Server.MapPath(FolderName));
FileInfo[] files = dir.GetFiles();
//create a new Avatar for each file and add to list
foreach (FileInfo file in files)
{
Avatar av = new Avatar(file.Name);
this.List.Add(av);
}
}
The AvatarCollection constructor calls the GetAvatars method which creates an Avatar object for each file in the specified folder and then adds it to the list. By making the GetAvatars method public, it can be called later, if the blank constructor is used. You may need to add some logic to delete any objects already in the list should the user call GetAvatars more than once.
Using the Collection
You can now make use the Avatar object and related collection within your code as a quick and easy DataSource. For instance, the code below sets the datasource of a drop-down list to an AvatarCollection.
AvatarCollection av = new AvatarCollection("avatars");
this.AvatarList.DataSource = av;
this.AvatarList.DataTextField = "Name";
this.AvatarList.DataBind();